Orders
Purpose
The Orders page is where you manage all customer orders from creation through delivery. This is the heart of your order fulfillment process, allowing you to track order status, process payments, manage delivery, and ensure customer satisfaction.
Accessing Orders
- Click Orders in the sidebar (always visible)
- Or click Modules → Orders & Sales → Orders
Orders List View
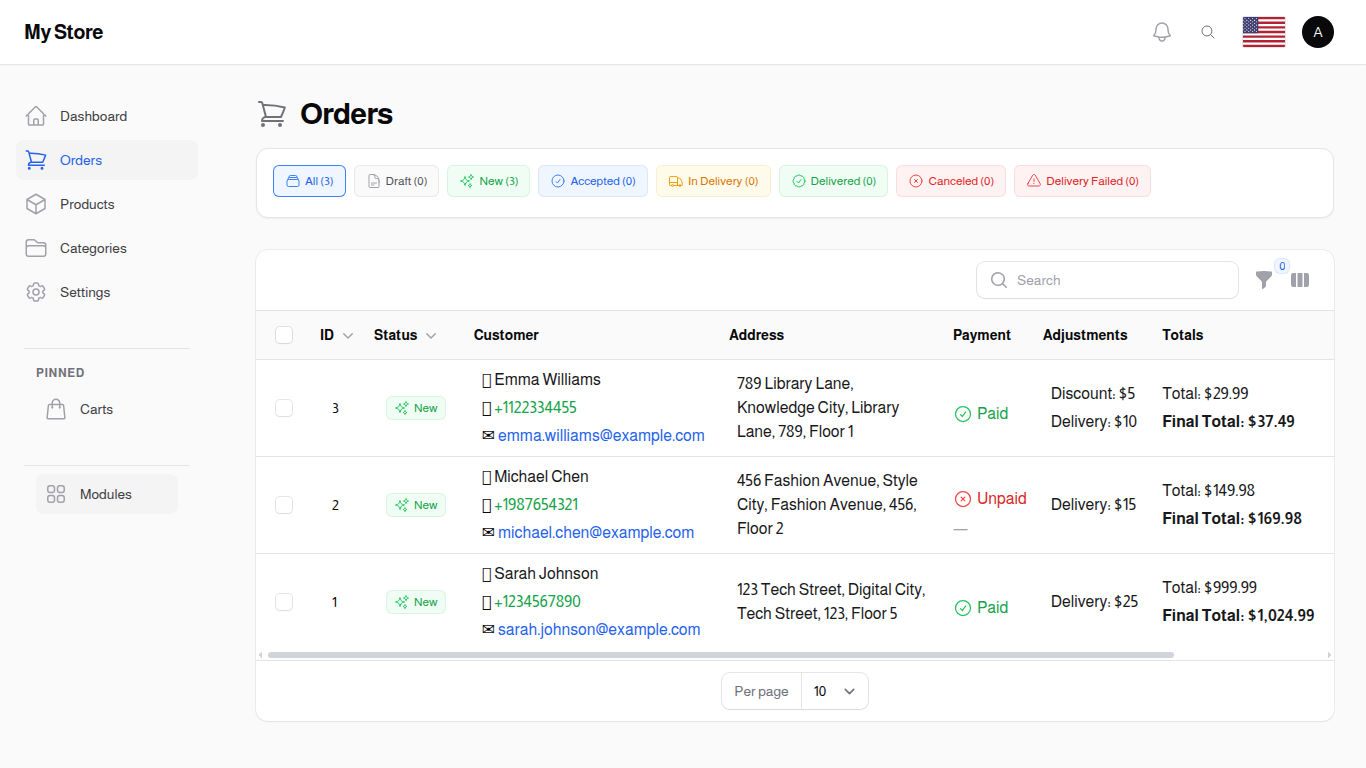
The Orders page with status filters and listing table
Filter by Status
At the top of the page, you'll see quick filter tabs showing order counts by status:
- All Orders: Shows all orders regardless of status
- Draft: Orders that are being created but not yet submitted
- Pending Review: Orders that the customer placed but that are awaiting an admin Publish action before they enter the regular fulfilment flow (inventory is not reserved yet)
- New: Newly received orders awaiting acceptance
- Accepted: Orders confirmed and ready for preparation
- In Delivery: Orders currently being delivered to customers
- Delivered: Successfully completed orders
- Canceled: Orders that were canceled
- Delivery Failed: Orders where delivery attempt was unsuccessful
Click any status tab to filter orders by that specific status. The number in parentheses shows how many orders are in each status.
List Features
Search Bar: Search for orders by order ID, customer name, phone number, or other order details
Filter Button: Click "Filter" to access advanced filtering options
Toggle Columns: Customize which columns are displayed in the order table
New Order Button: Click to create a new order manually
Exporting Orders
The Orders page provides export functionality to download order data in Excel or PDF formats for analysis, reporting, or record-keeping.
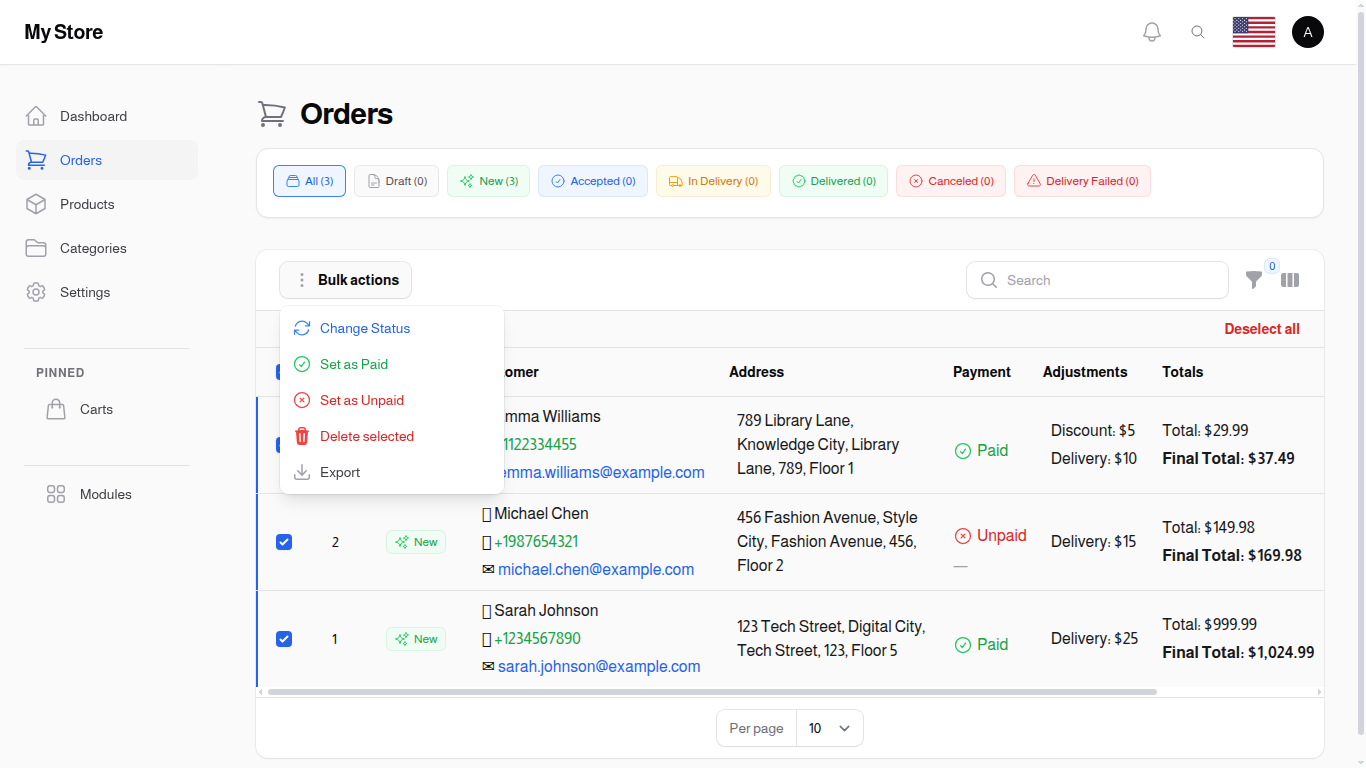
Export button options in the Orders list
Export All Orders
To export all orders (respecting current filters):
- Click the Export button in the header area (top-right of the table)
- Choose your preferred format:
- Excel (.xlsx): Ideal for data analysis and manipulation
- PDF (.pdf): Suitable for printing and archiving
The export will include all orders that match your current filter settings.
Export Selected Orders
To export specific orders:
- Select orders by checking the checkboxes on the left of each row
- Click the bulk action dropdown that appears
- Select Export
- Choose your preferred format (Excel or PDF)
Only the selected orders will be included in the export.
Exported Data Includes: - Order ID and status - Customer information - Order date and time - Order total and payment details - Delivery information - All visible columns from the table
PDF Invoice Export
You can generate professional PDF invoices for individual orders:
- Open the order you want to generate an invoice for
- Click the Export Invoice action button
- A PDF invoice will be generated and downloaded
The PDF invoice includes: - Store information and logo - Order details and ID - Customer information - Itemized list of products with prices - Tax, delivery, and total amounts - Payment status
Note: PDF generation is rate-limited to prevent abuse. If you need to generate many invoices, wait a few seconds between requests.
Order Row Actions
Each row in the orders list has a View button (eye icon) plus an actions menu (dots icon) with the following entries. Some actions only appear when relevant — for example Publish only shows on orders that are in Pending Review, and Set Payment Method is hidden on refunded orders.
View
Opens a slide-over panel with the full order summary (customer, items, payments, delivery) without leaving the list.
Edit
Opens the full order edit form. Once an order has been confirmed (paid by the customer or moved past Pending Review), some catalog-bound fields are locked to prevent customer-visible changes — see the Cart Management page for the full lock rules.
Toggle Paid Status
Quickly mark an order as paid or unpaid directly from the list view:
- Find the order in the list.
- Click Mark as Paid (or Mark as Unpaid if the order is already paid).
- Confirm in the dialog. A success notification reports the new state.
The action is hidden for cancelled orders so payment state cannot be flipped after cancellation.
Publish Order
Visible only when the order is in Pending Review. Clicking Publish Order:
- Moves the order to New status
- Reserves inventory by converting the held quantities into a real stock deduction
- Notifies the customer that their order has been accepted into the fulfilment queue
Publishing cannot be undone — once published the inventory hold is committed.
Payments
Opens the Order Payments resource pre-filtered to this order. You'll see every payment, refund, and partial-payment record tied to the order, including the amount, currency, method, and the staff member who recorded it.
Activity Log
Opens the Order Status History resource pre-filtered to this order — a chronological list of every status change, who made it, and when. For full-system audit trails (settings, prices, fees, etc.) see Activity Log.
Change Status
Opens a dialog with a single dropdown for picking a new order status. Useful when you need to skip a status (e.g. moving directly from New to In Delivery) instead of stepping through them one at a time.
Set Payment Method
Lets an admin replace the order's payment method after the order was placed — for example switching a customer from Cash on Delivery to Wallet because their wallet balance came in. The dialog also exposes two optional toggles for handling money already moved on the original method:
- Refund to wallet — only shown when the original method was Wallet. Credits the wallet by the previously paid amount and writes a refund line to the order's payment history.
- Deduct from wallet — only shown when the new method is Wallet. Debits the wallet by the order's final total (allowed to go negative if you've enabled overdrafts) and writes a payment line to the order's payment history.
The action is hidden once an order has been refunded so a refunded order's method cannot be silently changed.
View Invoice
Opens the customer-facing invoice page in a new tab. The first time you click it, a unique token is generated and saved on the order so you can share the same link safely with the customer.
Dispatch / Tracking Info
Used to send the order to a configured delivery partner and record the returned tracking number. The exact fields shown depend on which delivery method is selected — see Delivery Methods.
Copy Delivery Info
Quickly copy the delivery address and customer contact information to your clipboard:
- Find the order in the list view.
- Click Copy Delivery Info (clipboard icon).
- The formatted delivery details are copied to your clipboard.
- Paste into any application (messaging app, navigation app, etc.).
The copied information includes the customer name, phone number, and the complete delivery address with city and location details.
Order Payments Resource
The Payments menu item (under Orders & Sales) lists every payment line across all orders. Each row shows the amount, currency, method, type (payment / refund), status, paid-at timestamp, and the order it belongs to.
Use the Order ID filter at the top of the list to narrow the view to a single order — this is the same view you reach from the Payments action on an order row.
Order List Columns
The order list displays grouped columns for better organization:
Customer Info Column
Shows combined customer information: - Customer name - Phone number - Email address
Click the customer's phone or email to quickly contact them.
Address Info Column
Shows delivery address details: - City - Location/Area - Street address
Payment & Totals Group
Grouped columns showing financial information: - Total: Order total amount - Discount: Applied discount amount - Delivery: Delivery cost - Tax: Tax amount - Fees: Additional fees - Paid: Payment status indicator
These columns can be toggled on/off using the column visibility button.
Payment Receipts Column
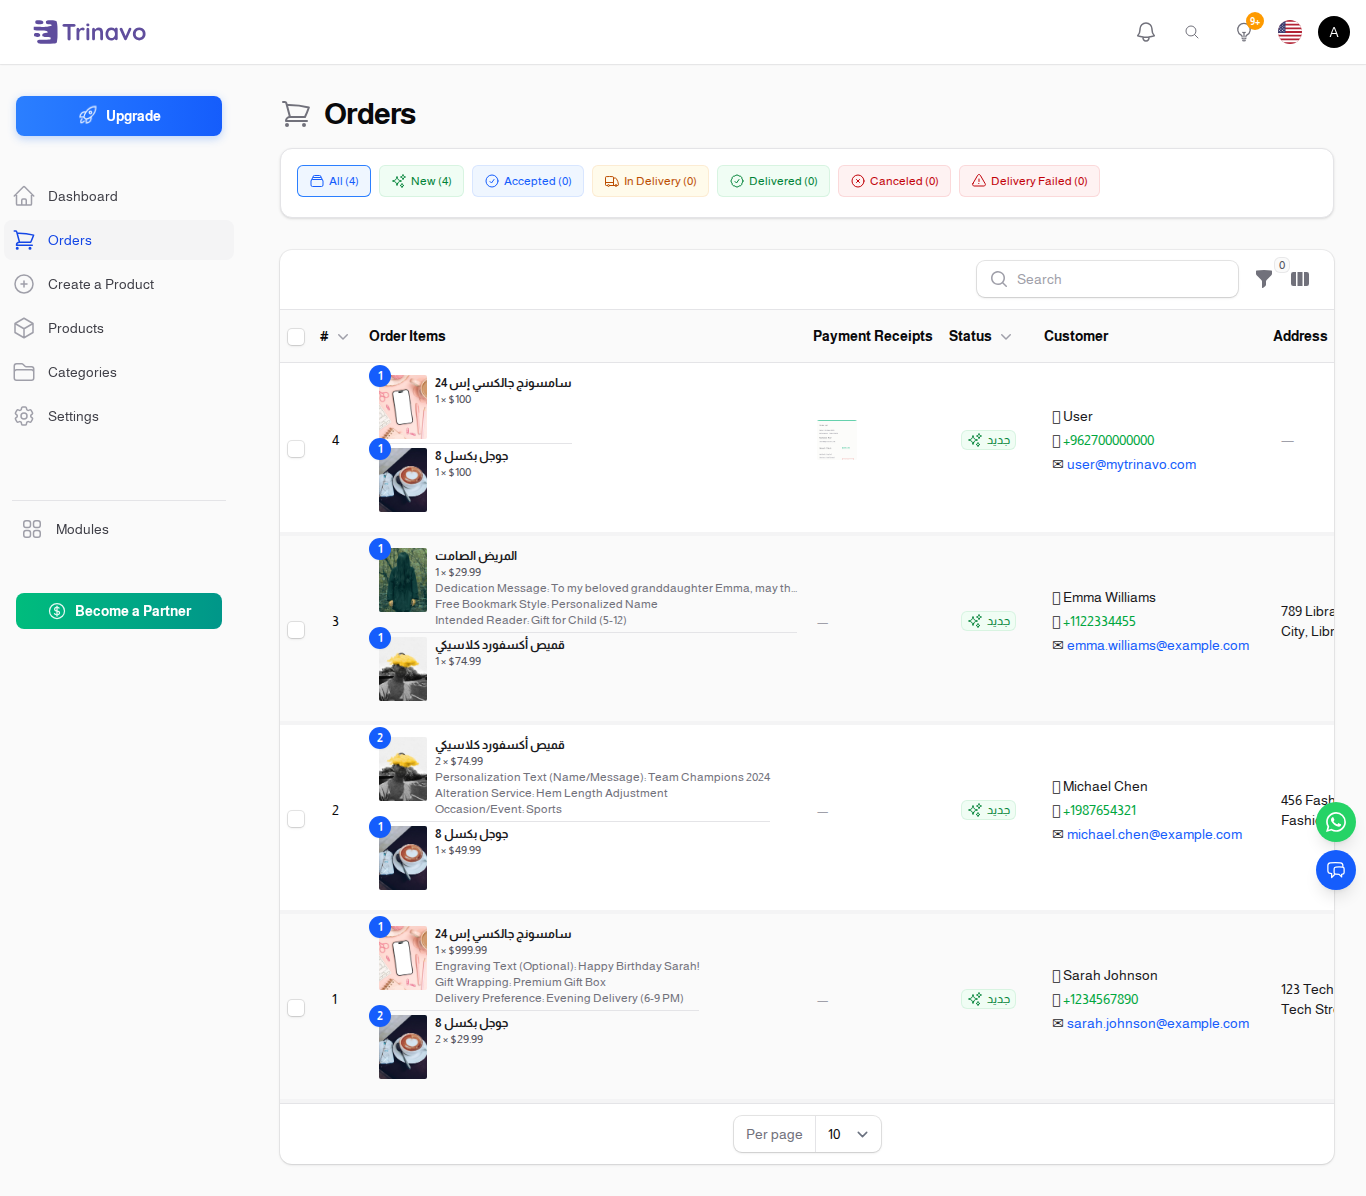
For orders paid through a Manual Payment method, this column gathers every receipt the customer uploaded against the order:
- Image receipts show as a small thumbnail. Click it to open a full-size lightbox.
- PDF receipts show as a download icon — click to open in a new tab.
- A simple "—" means no receipt has been uploaded yet.
The column is hidden by default. Turn it on once with the column visibility menu and your preference is remembered the next time you open the orders list. Each user has their own preference.
This column is most useful when filtering by unpaid orders so you can quickly verify each receipt before flipping the Paid toggle.
Creating a New Order
To create a new order, click the "New Order" button at the top right. The order form is organized into four tabs:
Basic Information Tab

Basic order information including customer details and payment status
Order Status
- Select the current status of the order
- Default is "Draft" for new orders
- Change status as the order progresses through fulfillment
User
- Select an existing registered user if the order is for a registered customer
- Leave empty for guest customers
Vendor
- Select the vendor/store responsible for this order
- Useful in multi-vendor marketplace setups
- Choose "No vendor" for platform-managed orders
Customer Name
- Enter the customer's full name
- Required for order processing and delivery
Customer Mobile
- Enter the customer's phone number
- Used for delivery coordination and order updates
Customer Email
- Customer's email address
- Used for order confirmations and notifications
Paid
- Toggle switch to indicate if payment has been received
- Turn ON if the order is paid
- Turn OFF if payment is pending
Payment Method
- Select how the customer will pay or has paid
- Options include cash on delivery, online payment, wallet, etc.
- Must match your configured payment methods
Coupon
- Apply a discount coupon code if the customer provided one
- Automatically calculates discount when applied
Order Items Tab
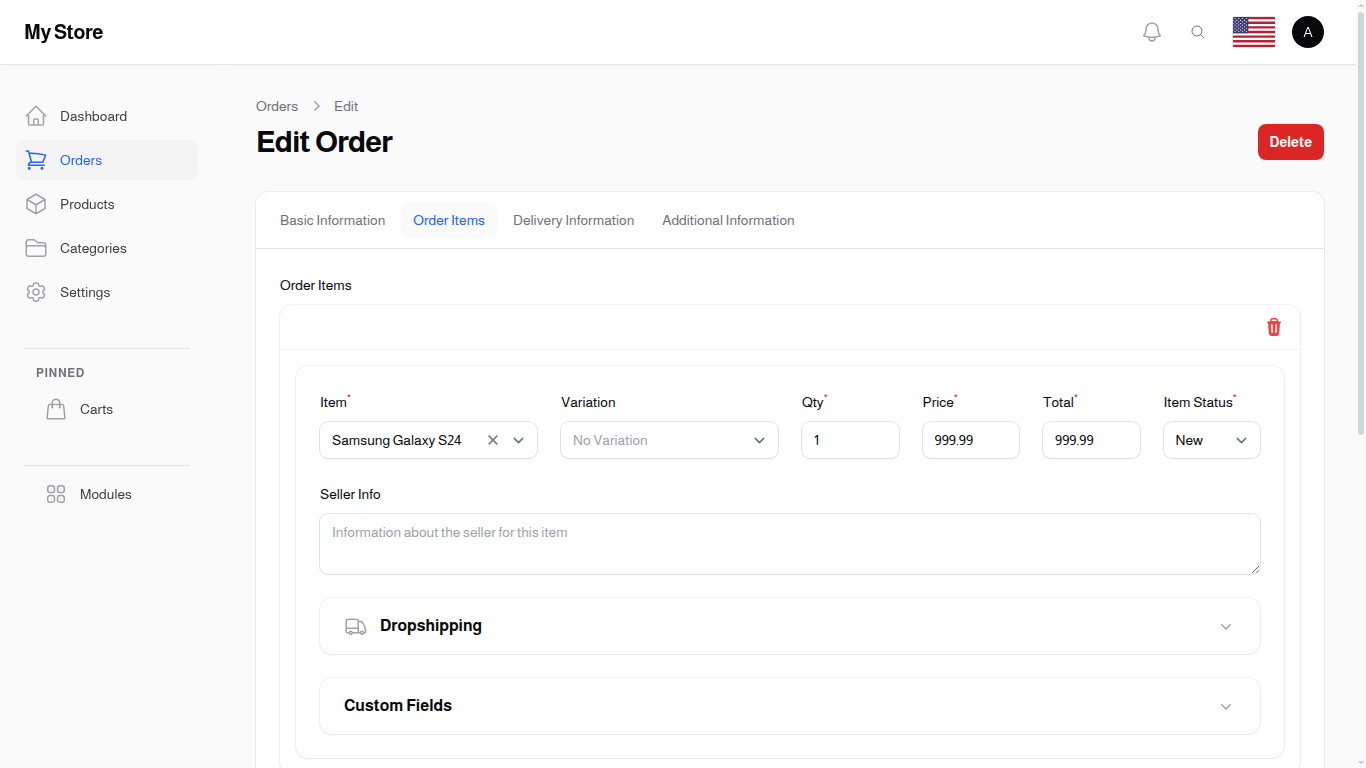
Order items and pricing calculations
Order Items Section
- Click "Add Item" to add products to the order
- Each item includes product selection, quantity, and price
- Can add multiple items to a single order
Discount
- Enter any discount amount to apply to the order
- This is in addition to coupon discounts
- Calculated from the subtotal
Tax
- Order tax amount
- Can be calculated automatically based on your tax rules
- Or entered manually
Fees
- Platform fees or service charges
- Automatically calculated from enabled fee items
- Based on your fee management settings
Delivery Cost
- Cost of delivery for this order
- Can be entered manually or calculated automatically
- Based on delivery method and location
Items Total
- Subtotal of all items before discounts and fees
- Automatically calculated from added items
Final Total
- The total amount the customer must pay
- Includes items, tax, fees, and delivery cost
- Minus any discounts applied
Delivery Information Tab

Delivery address and location details
Auto Calculate Delivery Cost
- Toggle ON to automatically calculate delivery cost based on location
- Toggle OFF to enter delivery cost manually
Delivery Method
- Select the delivery method (Standard, Express, etc.)
- Must match your configured delivery methods
Delivery Discount
- Special discount to apply to delivery cost
- Useful for free delivery promotions
Address
- Complete delivery address text
City
- Select the delivery city from dropdown
- Used for delivery cost calculation
Location
- Specific area or neighborhood within the city
- Helps delivery drivers find the address
Street Name
- Name of the street for delivery
Building Number
- Building or house number
Floor Number
- Apartment floor number if applicable
Delivery Latitude & Longitude
- GPS coordinates for precise location
- Helpful for delivery driver navigation
Additional Information Tab
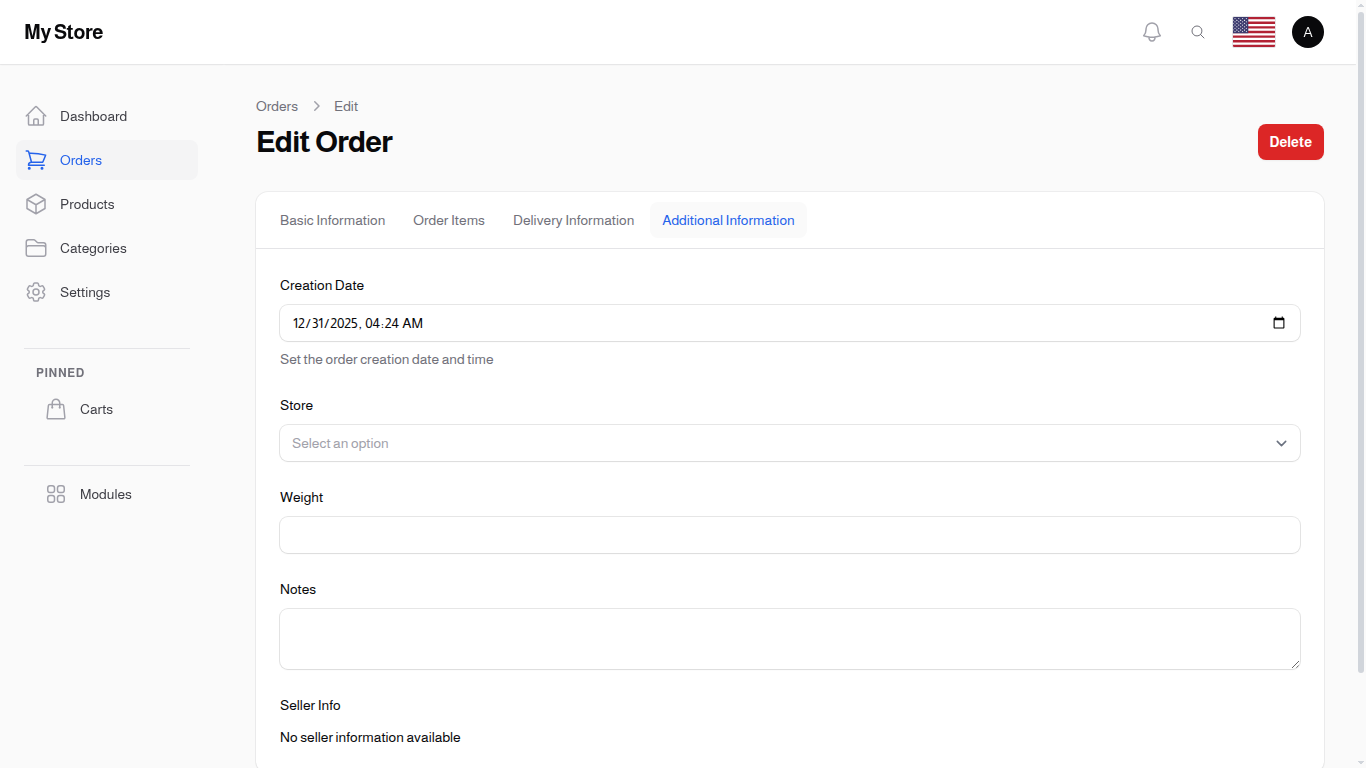
Order metadata and notes
Creation Date
- Date and time when the order was created
- Defaults to current date/time
- Can be adjusted if needed
Store
- Select which store/branch this order belongs to
- For multi-store setups
Weight
- Total weight of the order
- Used for delivery cost calculation
Notes
- Any special instructions or notes about the order
- Visible to staff processing the order
- Can include customer requests or internal notes
Understanding Order Statuses
Orders progress through different statuses during their lifecycle:
Draft
- Order is being created but not yet finalized
- Not visible to customers
- Can be edited freely
Pending Review
- The customer placed the order, but it has not yet entered the fulfilment queue
- Inventory is held (reserved) but not yet deducted — see Inventory Management
- An admin must use the Publish Order action to move it to New before delivery work begins
- Used as a moderation step when stock-holding is enabled in settings
New
- Order has been received and awaits processing
- Requires immediate attention
- Move to "Accepted" once reviewed
Accepted
- Order has been confirmed and is being prepared
- Customer is notified
- Ready for fulfillment
In Delivery
- Order is currently being delivered to the customer
- Delivery driver has the order
- Customer can track delivery
Delivered
- Order successfully delivered to customer
- Order lifecycle complete
- Affects revenue calculations
Canceled
- Order was canceled by customer or admin
- No delivery will occur
- May require refund processing
Delivery Failed
- Delivery attempt was unsuccessful
- May require rescheduling
- Contact customer to resolve issues
Editing Orders
To edit an existing order:
- Find the order in the list view
- Click the "Edit" button or click on the order row
- Make necessary changes in the appropriate tab
- Click "Save" to update the order
Viewing Order Details
Click on any order in the list to view its complete details, including:
- All customer information
- Ordered items and quantities
- Payment status and method
- Delivery information
- Order history and status changes
Order Cancellation Requests
When the Order Cancellation feature is enabled in Order Cancellation Settings, customers can cancel their orders from the order details page on the storefront.
How Cancellation Works
There are two cancellation flows depending on the order status:
- Direct cancellation: If the order is in New or Accepted status, the customer can cancel it immediately without admin approval.
- Cancellation request: If the order is in In Delivery or Delivered status, the customer submits a cancellation request with a reason. This request requires admin review.
Managing Cancellation Requests
To manage cancellation requests:
- Go to Orders & Sales → Cancel Requests in the sidebar
- You will see a list of all cancellation requests with their status
Each request shows:
- Order number — click to open the order
- Customer name — who requested the cancellation
- Reason — why the customer wants to cancel
- Status — Pending, Accepted, or Rejected
- Date — when the request was submitted
Reviewing a Cancellation Request
- Click the eye icon to open the cancellation request details page
- Click View Order to see the full order details in a side panel
- Choose one of the following actions:
- Accept — The order will be cancelled and the customer will be notified
- Reject — You will be asked to provide a reason. The customer will see this reason on their order details page
A badge on the Cancel Requests menu item shows how many pending requests need your attention.
Notifications
- When a customer cancels an order directly or submits a cancellation request, admins receive a notification (in the admin panel, email, and other configured channels)
- When an admin accepts or rejects a request, the customer receives a notification with the result
Tips for Managing Orders
- Process New Orders Promptly: Check the "New Orders" count regularly and process them quickly
- Verify Customer Information: Ensure phone numbers and addresses are correct before accepting orders
- Update Status Regularly: Keep order status current so customers can track their orders
- Use Notes Field: Add any important information about special requests or issues
- Monitor Draft Orders: Review and complete or delete draft orders to keep your list clean
- Check Payment Status: Verify payment is received before processing delivery
Order Workflow Best Practice
Recommended workflow for processing orders:
- New Order → Review order details and customer information
- Accept Order → Confirm you can fulfill the order
- Prepare Items → Get products ready for delivery
- Assign for Delivery → Change status to "In Delivery"
- Complete Delivery → Mark as "Delivered" once customer receives order
By following this workflow, you ensure smooth order processing and happy customers!
Related Configuration
Configure cart and checkout settings in System Settings:
- Cart Mode - Control cart behavior (Default, Disabled, or Single Item)
- Allow Guest Cart - Let guests add items to cart without logging in
- Enforce Quantity Above Zero - Require quantity greater than 0 when adding items
- Delivery Form Fields - Control which checkout fields are visible to customers
- Order Cancellation - Allow customers to cancel orders
Related Sections
- Dashboard - Quick order overview
- Analytics - Order reporting
- Order Statuses - Manage order states
- Delivery Methods - Shipping options
- Order Cancellation Settings - Enable or disable order cancellation