Payment Methods
Purpose
Configure payment gateway plugins and payment methods available to customers during checkout (e.g., Cash on Delivery, Credit Card, PayPal, Bank Transfer).
Accessing Payment Methods
Click Modules → Delivery & Payments → Payment Methods
List View
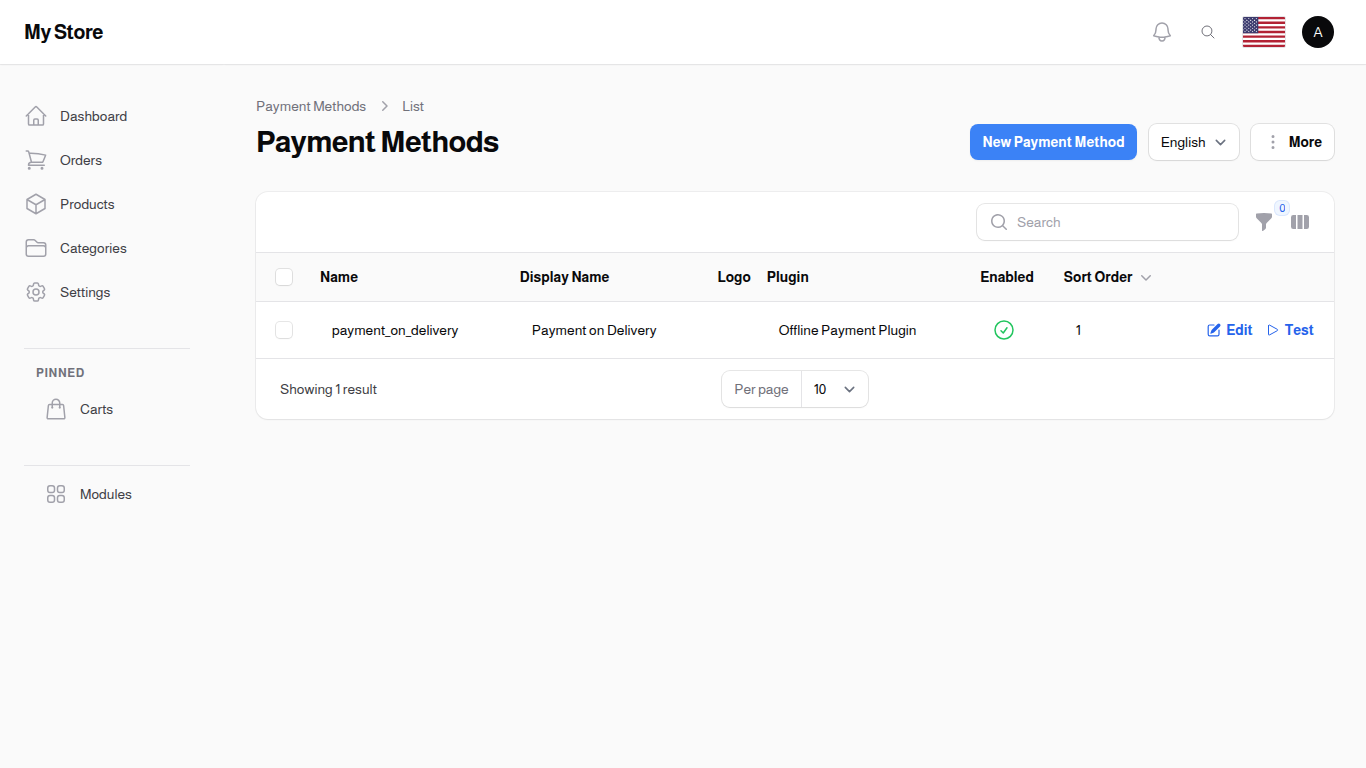
The list displays all configured payment methods and their plugin settings.
Table Columns
Name
- Format: Text (up to 255 characters)
- Purpose: Internal identifier for this payment method configuration
Display Name
- Format: Text (up to 255 characters)
- Purpose: Customer-facing label shown during checkout
Logo
- Format: Image thumbnail (square, 40px)
- Purpose: Payment method icon displayed to customers
Plugin Name
- Format: Text
- Purpose: Name of the payment plugin powering this method
Enabled
- Format: Icon toggle (checkmark = enabled, X = disabled)
- Purpose: Whether this payment method is available to customers
Sort Order
- Format: Number
- Purpose: Display order in customer checkout (lower numbers appear first)
Row Actions
- Edit: Configure payment method settings
- Test: Test payment gateway connection (if available)
Bulk Actions
- Delete: Remove multiple payment methods
- Export: Export payment method data to Excel/CSV
Creating a Payment Method
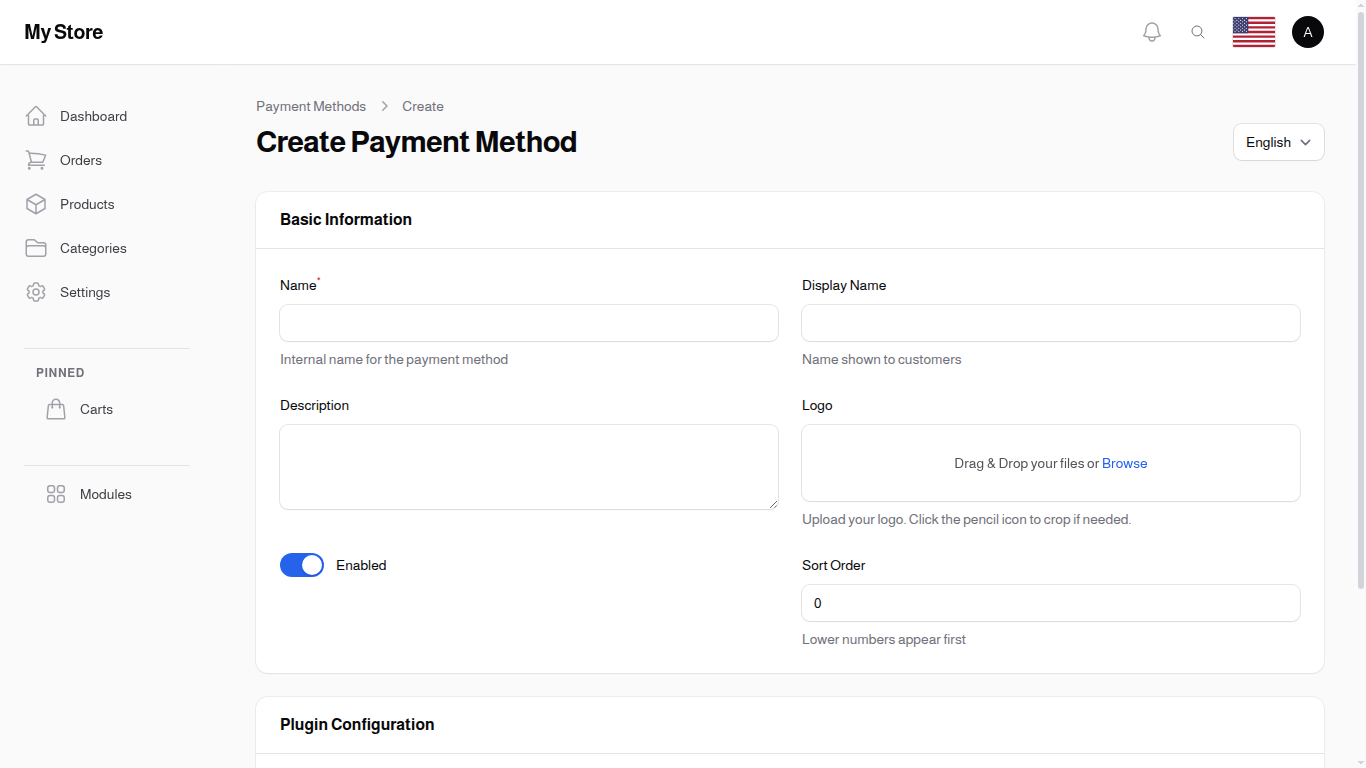
Click "New Payment Method" to add a new payment option.
Basic Information Section
Name Required
- Type: Text input (max 255 characters)
- Purpose: Internal name for tracking
- Examples: "COD", "Credit Card Stripe", "PayPal Express"
Display Name Optional
- Type: Text input (max 255 characters)
- Purpose: Name shown to customers at checkout
- Default: Uses Name if not specified
Description Optional
- Type: Text area (3 rows)
- Purpose: Additional information shown to customers
- Examples: "Pay in full when your order is delivered", "Fast and secure payment"
Logo Optional
- Type: File upload (image only)
- Purpose: Payment method icon displayed at checkout
- Format: Images are stored publicly
Enabled Optional
- Type: Toggle switch (On/Off)
- Default: On (enabled)
- Purpose: Show this payment method to customers
Sort Order Optional
- Type: Number input (default 0)
- Purpose: Position in payment method list (lower numbers appear first)
Plugin Configuration Section
Payment Plugin Required
- Type: Searchable dropdown
- Purpose: Select the payment gateway to use
- Options: Available payment plugins (Stripe, PayPal, Bank Transfer, Cash on Delivery, etc.)
Plugin Information
- Type: Informational text
- Purpose: Shows plugin description and documentation
Plugin Settings Section
Dynamic Plugin Fields Varies by Plugin
- Type: Varies (text, password, number, checkbox, select)
- Purpose: Plugin-specific configuration (API keys, merchant IDs, webhook settings, etc.)
- Storage: Stored securely in settings field
Common Settings Examples:
- API Key / Secret Key
- Merchant ID
- Store ID
- Webhook URL
- Test Mode toggle
Create Actions
- Create: Save and return to list
- Create & Create Another: Save and open blank form for next entry
- Cancel: Discard changes
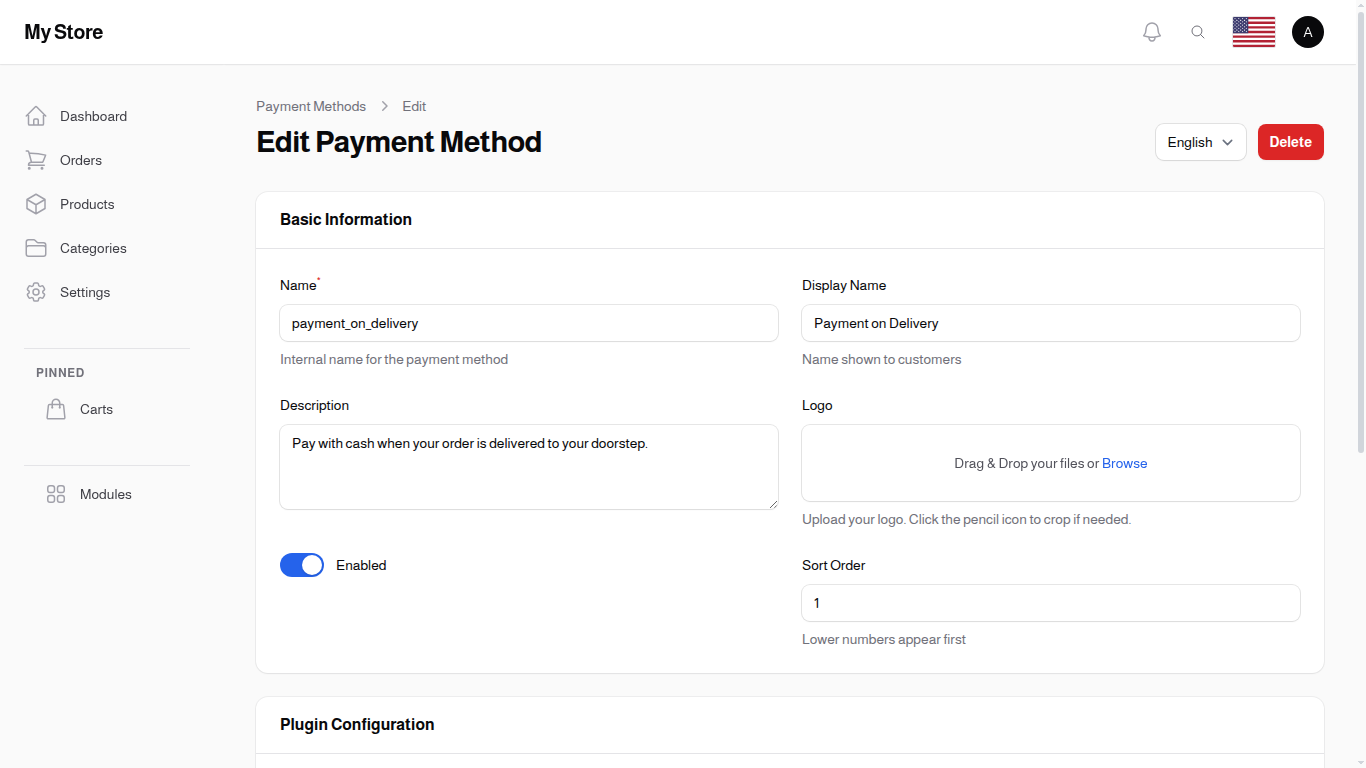
Editing a Payment Method
Click the Edit icon to modify a payment method's settings or update plugin credentials.
Testing Payment Gateway
Click the Test button (if available) to verify the payment gateway connection and credentials.
Pay-by-Link Payment Methods
Some gateways support per-product / per-order pay-by-link flows: instead of routing the customer through the standard checkout, you generate a one-shot URL the customer can pay from their phone, email, or chat. These methods get their own list view filtered by the pay_by_link capability.
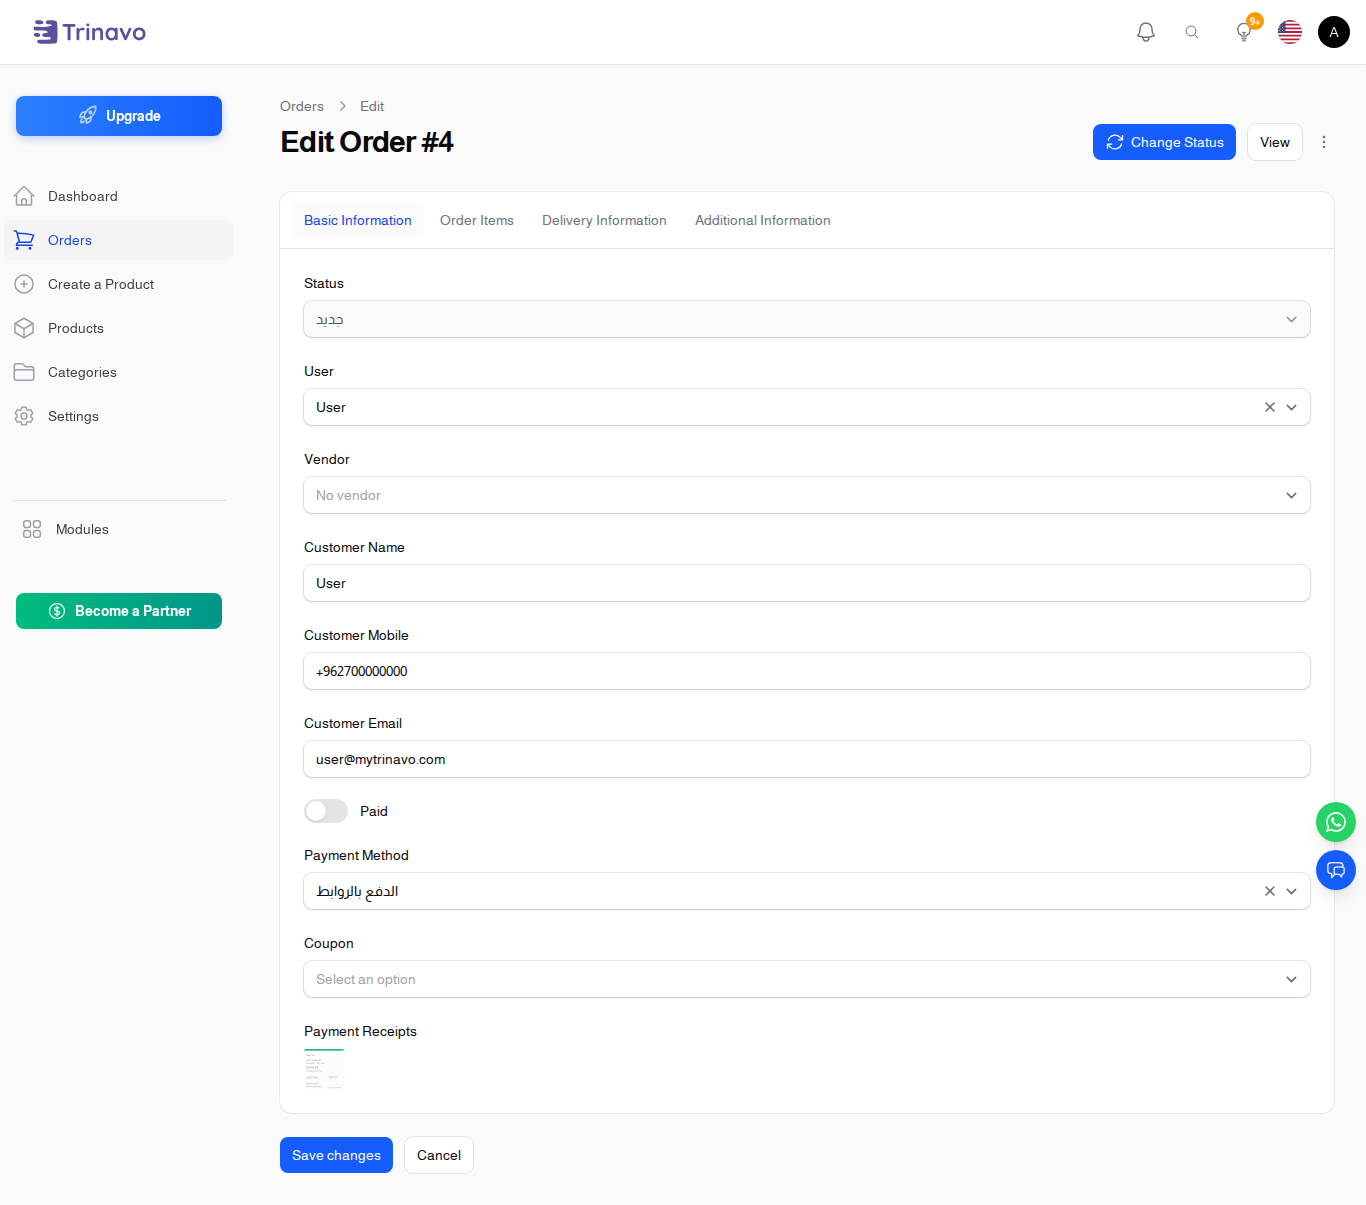
When a pay-by-link gateway is configured, the Order edit page exposes a "Generate payment link" action. The link is short-lived and tied to the order's outstanding balance.
Key Information
- Super Admin Only: Only super admin can manage payment methods
- Plugin-Based: Each method uses a payment plugin for processing
- Customer Visibility: Disabled methods don't appear at checkout
- Sort Order: Controls order payment methods appear during checkout
- Plugin Credentials: Stored securely per payment method
- Multiple Methods: Configure multiple methods for customer convenience
- Test Mode: Most plugins support test/production mode switching in plugin settings
Available Payment Plugins
The system includes several built-in payment plugins. Each plugin has specific configuration requirements.
HyperPay
A payment gateway popular in the Middle East, supporting multiple card brands through COPYandPAY widget integration.
Configuration Settings:
| Setting | Description |
|---|---|
| Entity ID (Test) | HyperPay Entity ID for test environment |
| Access Token (Test) | HyperPay Access Token for test environment |
| Base URL (Test) | Test environment URL (default: https://eu-test.oppwa.com) |
| Entity ID (Production) | HyperPay Entity ID for production |
| Access Token (Production) | HyperPay Access Token for production |
| Base URL (Production) | Production environment URL (default: https://eu-prod.oppwa.com) |
| Supported Brands | Card brands to accept (e.g., VISA MASTER AMEX) |
| Test Mode | Toggle between test and production environments |
Getting Credentials: 1. Register for a HyperPay merchant account 2. Access the HyperPay developer portal 3. Obtain Entity ID and Access Token for both environments 4. Configure supported card brands based on your agreement
Stripe
Global payment gateway supporting cards, Apple Pay, Google Pay, and Link across 46+ countries and 135+ currencies. Customers are redirected to a secure Stripe-hosted checkout page.
Configuration Settings:
| Setting | Description |
|---|---|
| Secret Key (Test) | Stripe test secret key (starts with sk_test_) |
| Webhook Secret (Test) | Optional. Stripe test webhook signing secret (starts with whsec_) |
| Secret Key (Production) | Stripe live secret key (starts with sk_live_) |
| Webhook Secret (Production) | Optional. Stripe production webhook signing secret |
| Test Mode | Toggle between test and production environments |
Getting Credentials: 1. Create a free Stripe account at https://stripe.com 2. Open the Stripe dashboard at https://dashboard.stripe.com/apikeys 3. Copy the Secret key for test mode (and the live key once your account is activated) 4. Optional: create a webhook endpoint at https://dashboard.stripe.com/webhooks and copy the signing secret 5. Paste the keys into the Stripe payment method in Trinavo and enable it
Paymob
A payment gateway with regional support for Egypt, Saudi Arabia, Oman, and UAE.
Configuration Settings:
| Setting | Description |
|---|---|
| Country | Select your region (Egypt, Saudi Arabia, Oman, UAE) |
| Secret Key | Server-side API key (starts with egy_sk_ or similar) |
| Public Key | Client-side checkout key (starts with egy_pk_ or similar) |
| Integration ID | The integration ID for card payments |
| HMAC Secret | Secret for verifying callback signatures |
| Test Mode | Toggle between test and production modes |
Supported Regions: - Egypt: EGP currency, accept.paymob.com - Saudi Arabia: SAR currency, ksa.paymob.com - Oman: OMR currency, oman.paymob.com - UAE: AED currency, uae.paymob.com
Getting Credentials: 1. Create a Paymob merchant account for your country 2. Navigate to Developers section in dashboard 3. Create an integration for card payments 4. Copy API keys and Integration ID 5. Set up HMAC secret for secure callbacks
Mamopay
UAE-first hosted-checkout gateway. Customers are redirected to a Mamopay-hosted page, pay there, and are returned to your store. Trinavo verifies every transaction server-side, so the payment status never relies on URL parameters alone.
Configuration Settings:
| Setting | Description |
|---|---|
| API Key (Test) | Sandbox API key (request from [email protected]) |
| API Key (Production) | Production API key from the Mamo Business dashboard (Developer → Keys) |
| Test Mode | Toggle between sandbox and production |
| Webhook Auth Header Value | Shared secret you registered as auth_header on POST /webhooks |
| Webhook Auth Header Name | HTTP header Mamopay uses to deliver the secret. Default: Authorization |
| Force Currency | Optional. Force all charges to AED, USD, EUR, GBP, or SAR |
Getting Credentials:
1. Request a sandbox account from [email protected]
2. Copy the sandbox API key, paste it under "API Key (Test)" in Trinavo, save, and run a test payment using a sandbox card (e.g., 4242 4242 4242 4242, CVV 123, expiry 01/28, 3DS password Checkout1!)
3. When ready for production, log into the Mamo Business dashboard, copy your production key, paste it under "API Key (Production)", and turn off Test Mode
4. Optional: register a webhook in the Mamopay dashboard pointing at /payment-gateway/api/mamopay_payment/webhook and set auth_header to a strong random secret. Paste the same secret into "Webhook Auth Header Value" in Trinavo
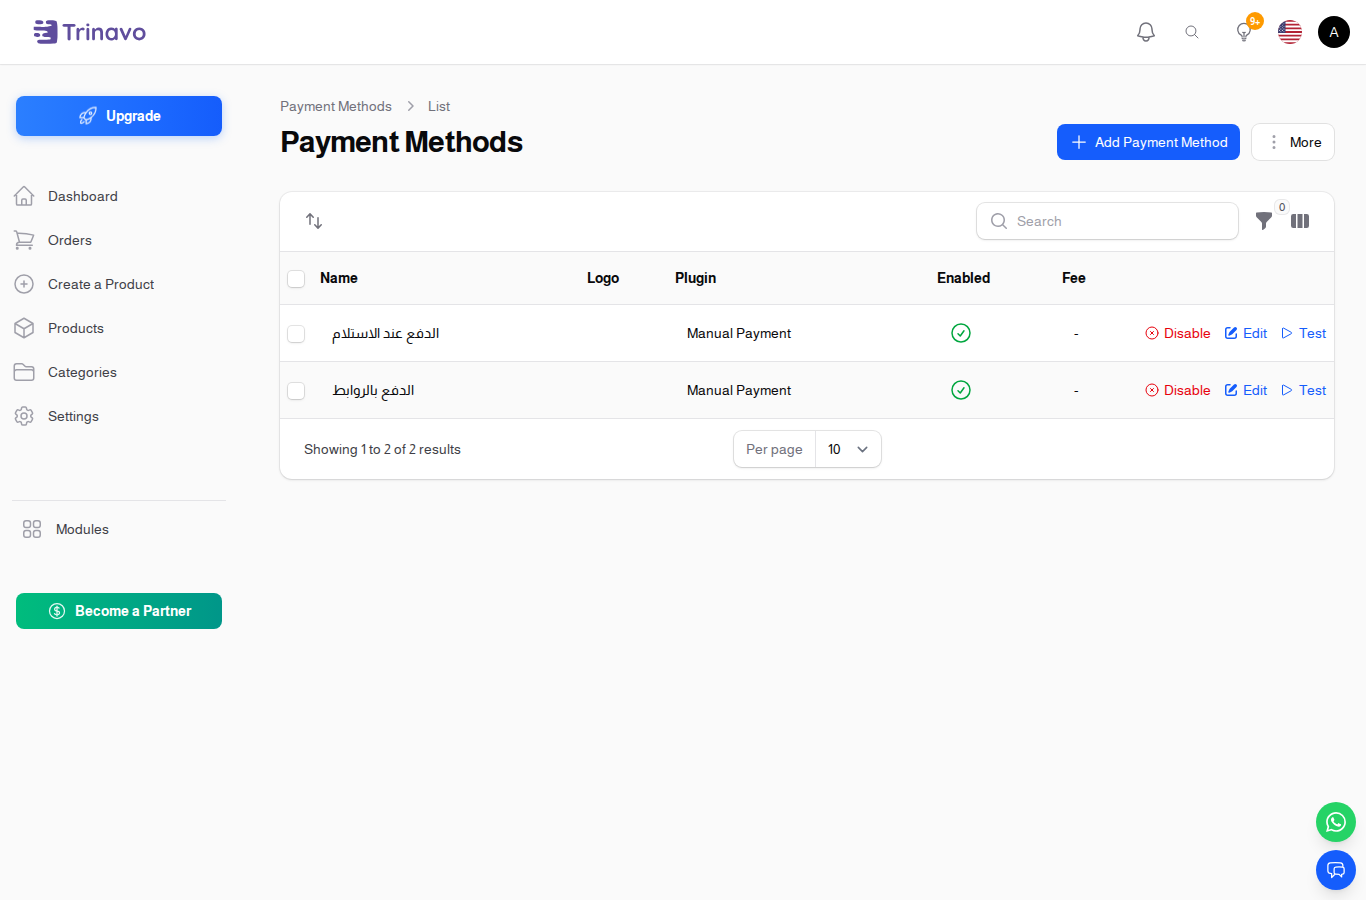
Manual Payment (Pay by Link)
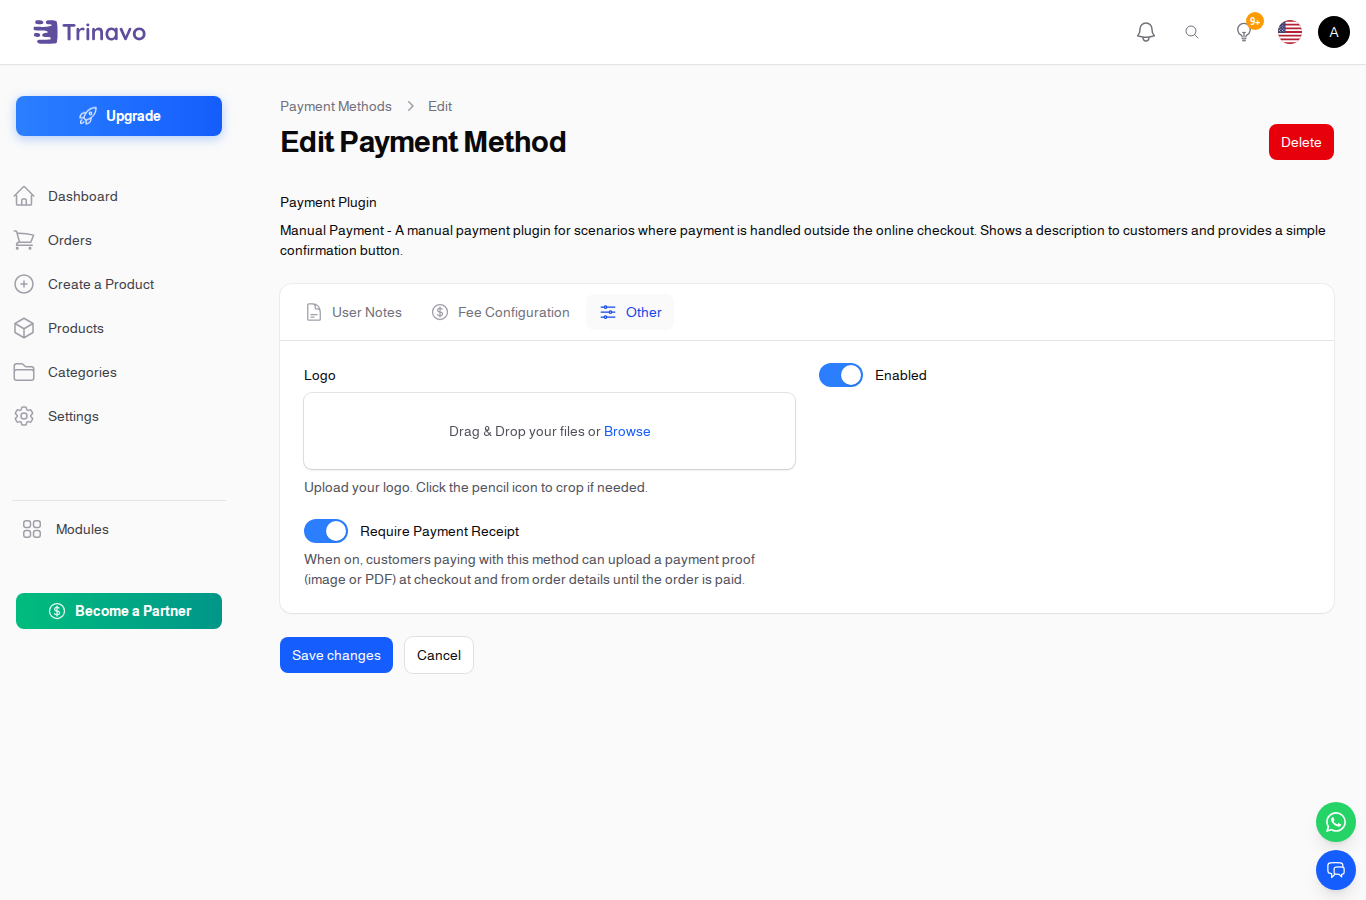
The Manual Payment plugin (also known as Pay by Link / الدفع بالروابط) is the right choice when you don't have an automatic gateway, or when you want each product to be paid through its own external link (PayPal, Stripe link, Tap link, bank transfer instructions, etc.). It powers Cash on Delivery, bank transfer, and any "I'll pay you outside the store" flow.
Configuration Settings:
| Setting | Description |
|---|---|
| Name | Internal label, e.g. "Bank Transfer", "Pay by Link" |
| Display Name | What the customer sees at checkout |
| Description (Notes) | Rich text shown to the customer on the offline-payment page (account number, instructions, deadlines…). HTML allowed. |
| Logo | Optional icon. Shown next to the method at checkout |
| Enabled | Toggle the method on/off for customers |
| Require Payment Receipt | Optional. When ON, the customer can upload a payment proof (image or PDF, up to 5 MB) at checkout and later from their order details until you mark the order as paid |
| Sort Order | Position in the list at checkout |
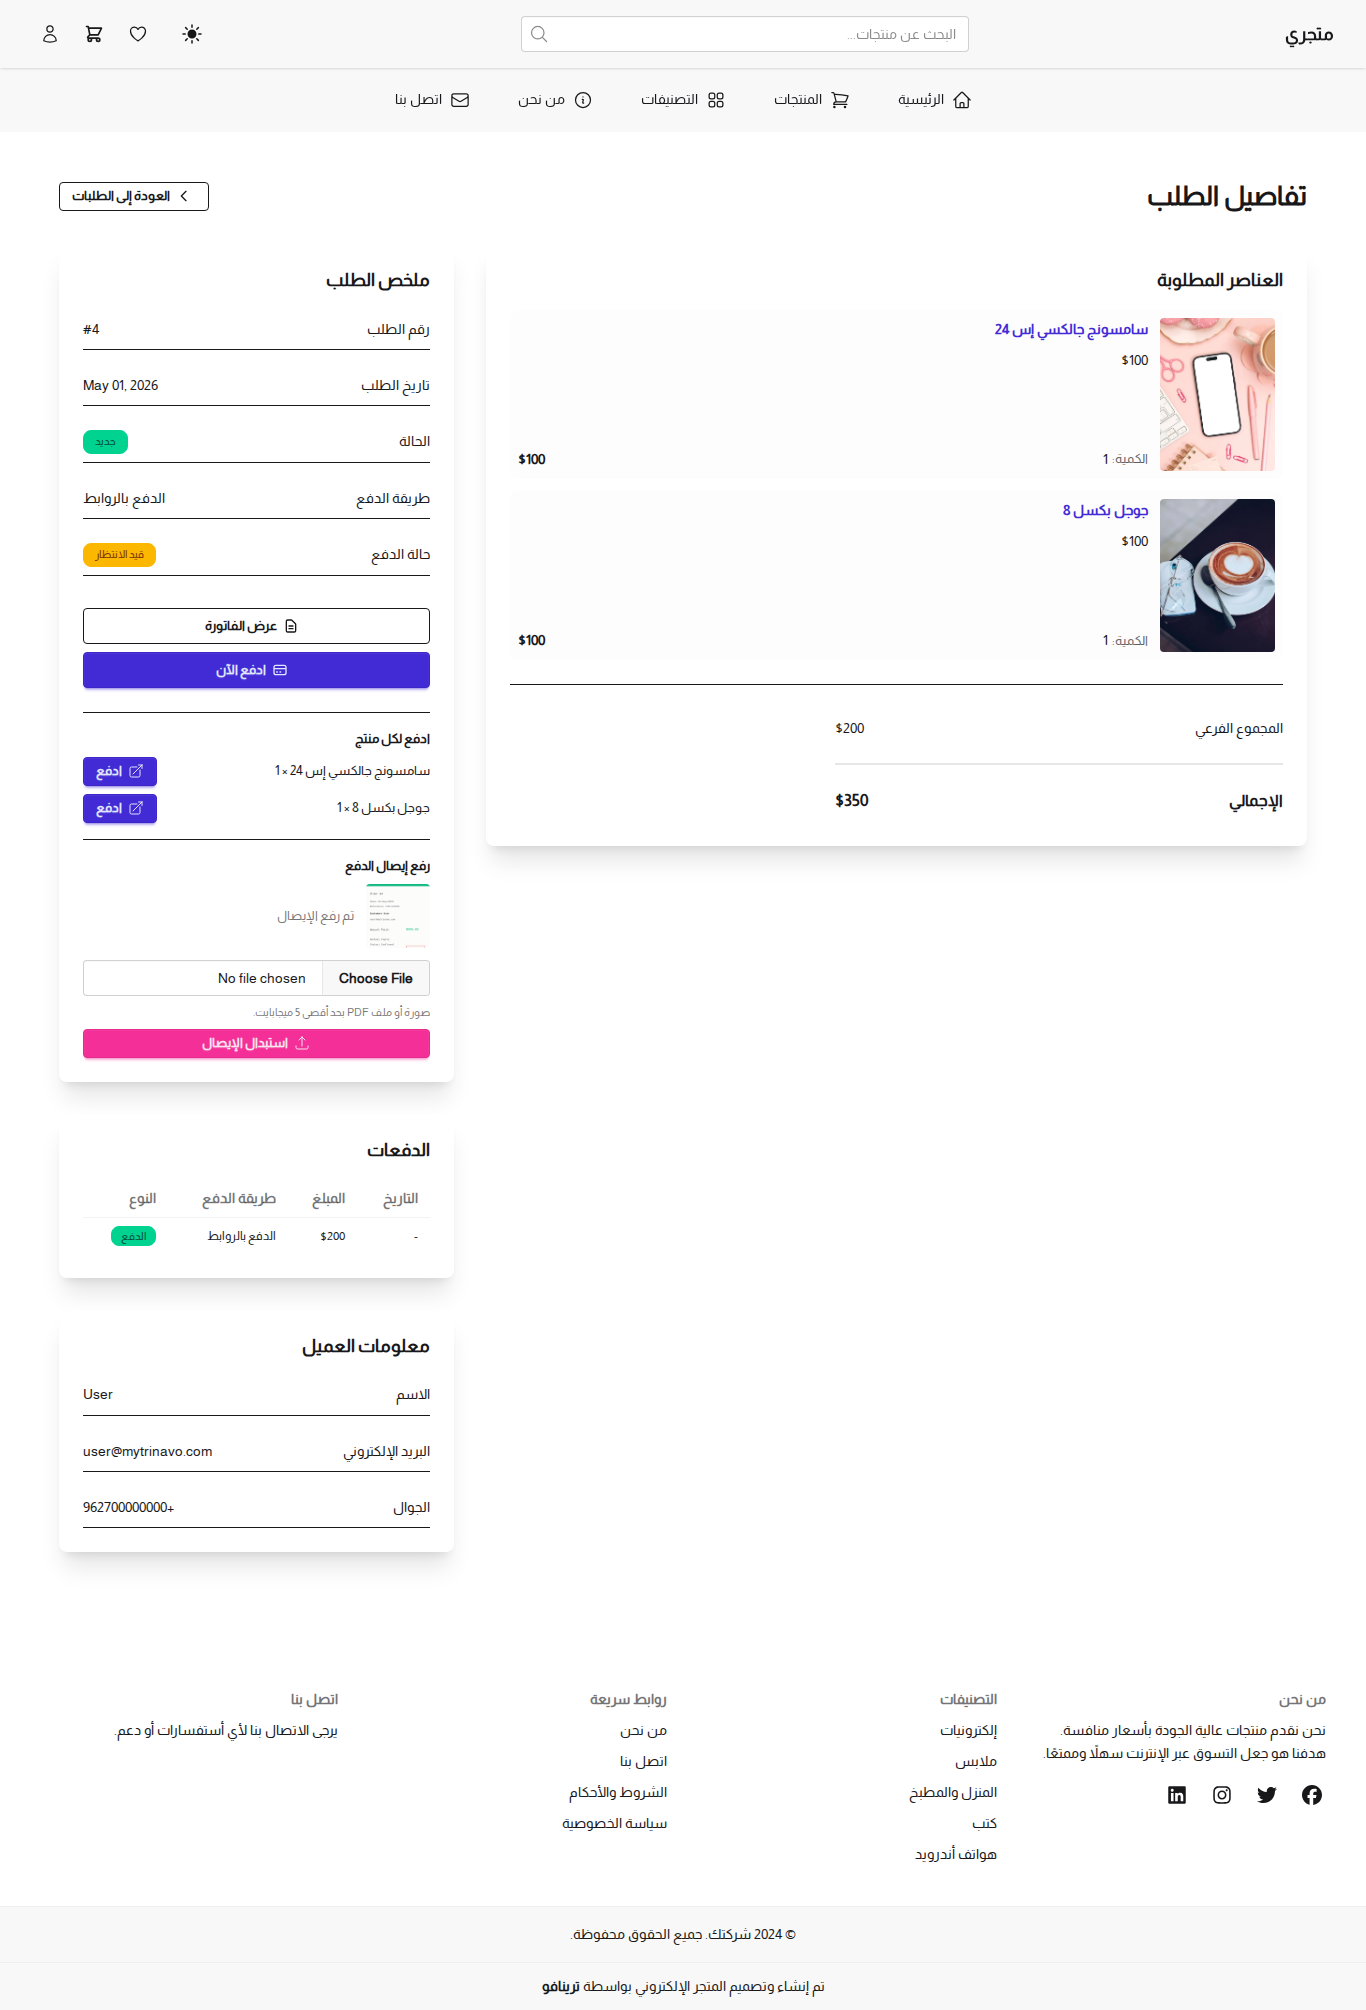
How "Require Payment Receipt" works:
- Customer picks this manual method at checkout.
- They see your description (transfer instructions, account info, etc.).
- If any of the products in their cart have a Payment Link, each one is shown as its own "Pay" button that opens in a new tab.
- They upload a screenshot or PDF of the bank transfer / PayPal receipt.
- They click Confirm Order. The order is created in the New status with payment marked as pending.
- The receipt is attached to the order's payment record. You can review it on the Orders list (toggle the "Payment Receipts" column on) or on the order edit page.
- If the customer didn't have the proof ready at checkout, they can come back to My Orders → Order Details and upload (or replace) the receipt at any time until you mark the order paid.
Customer view of the order details page (Pay buttons + receipt upload):
Use cases:
- Cash on delivery (no link, no receipt needed — just enable the method).
- Bank transfer with mandatory proof (turn ON "Require Payment Receipt", paste the IBAN / instructions in the description).
- Pay-by-link per product (set the Payment Link on each product so the customer pays each item directly).
The plugin doesn't talk to any external API, so no credentials are needed.
Other Available Plugins
- Moyasar: Saudi Arabia payment gateway
- Tabby: Buy now, pay later service
- Tamara: Buy now, pay later service
- AlawnehPay: Regional payment gateway
- User Wallet: Pay using store wallet balance
Related Sections
- User Wallets - Enable wallet payments at checkout
- Plugins - Manage payment plugins
- Orders - View order payment details
- System Settings - Store payment configuration