Landing Pages
Overview
A landing page is a page that sells one product and nothing else. There is no menu, no footer, no search box, and no related products - just your product, your offer, and a Buy button. You create one from a product you already have, and you get a short link you can share on WhatsApp, in an ad, or on a printed flyer.
Everything you already know about the store still applies. A landing page sale is a normal order, so payments, order statuses, invoices, and reports work exactly the way they do for any other sale.
Why landing pages matter
When you pay for an ad, every distraction costs you money. A visitor who arrives at your normal store sees a menu, a search box, other products, and a footer full of links - and often leaves without buying anything. A landing page removes every exit: one product, one price, one button.
It also does three things your product page cannot. The discount applies itself, so nobody has to hunt for a coupon code. A countdown starts the moment the visitor opens the page, so the offer feels urgent to everyone who sees it. And every page keeps its own report, so you finally know which ad, which influencer, or which WhatsApp broadcast actually earned money.
Enabling landing pages
Navigate to: Settings > Landing Pages
Turn on Enable Landing Pages and click Save.
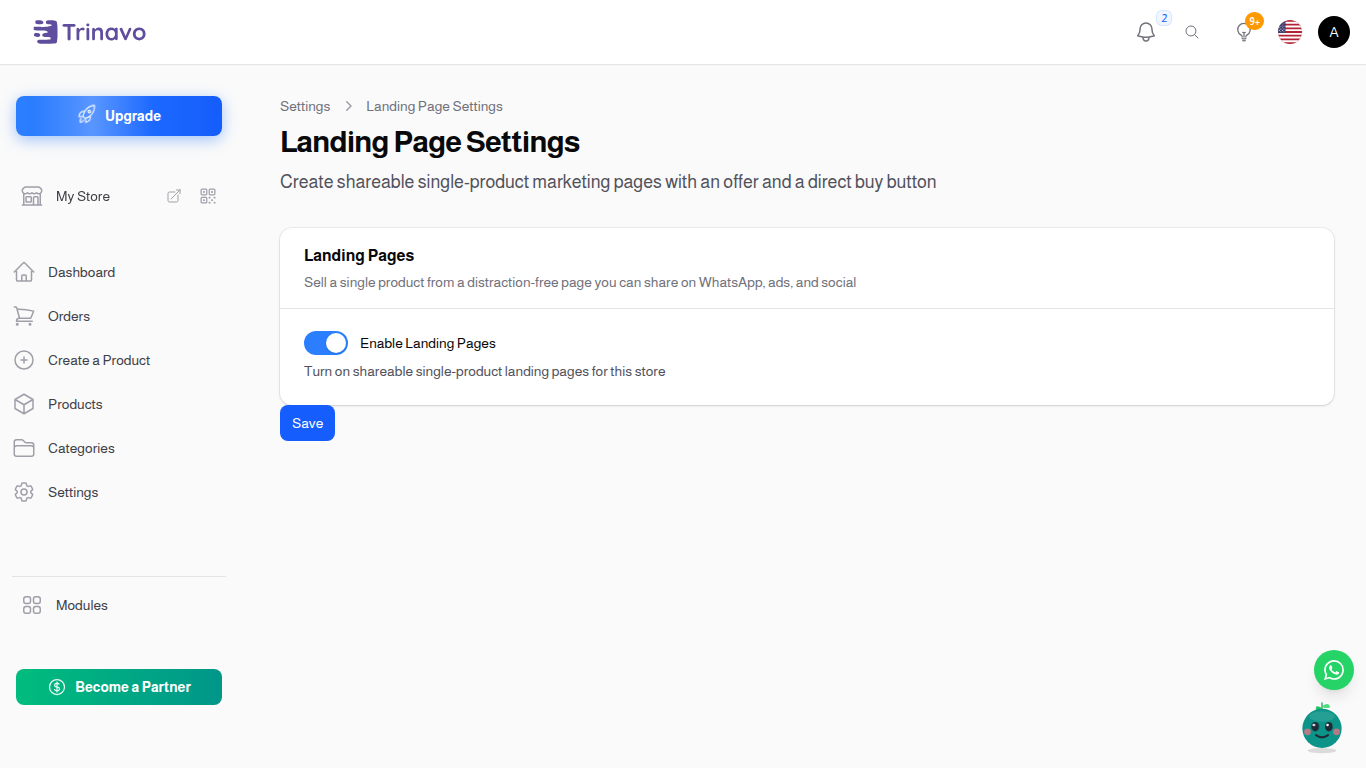
Note: Landing Pages is a premium feature. If your store is not on a paid plan, you can still see your landing pages, but you cannot create or change them and their links will not open for customers. The page shows an upgrade prompt, and you can start a free trial from there.
Tip: most visitors arriving from an ad are new customers. Turn on Allow Guest Cart in Settings > Cart so they can buy without creating an account first.
Creating a landing page
The fastest way is straight from the product.
Navigate to: Products, find your product, open its actions menu, and choose Landing Page.
If the product has no landing pages yet, the form opens right away. Give the campaign a name, optionally set a discount and a countdown, and click Create. That is all it takes - your link is ready.
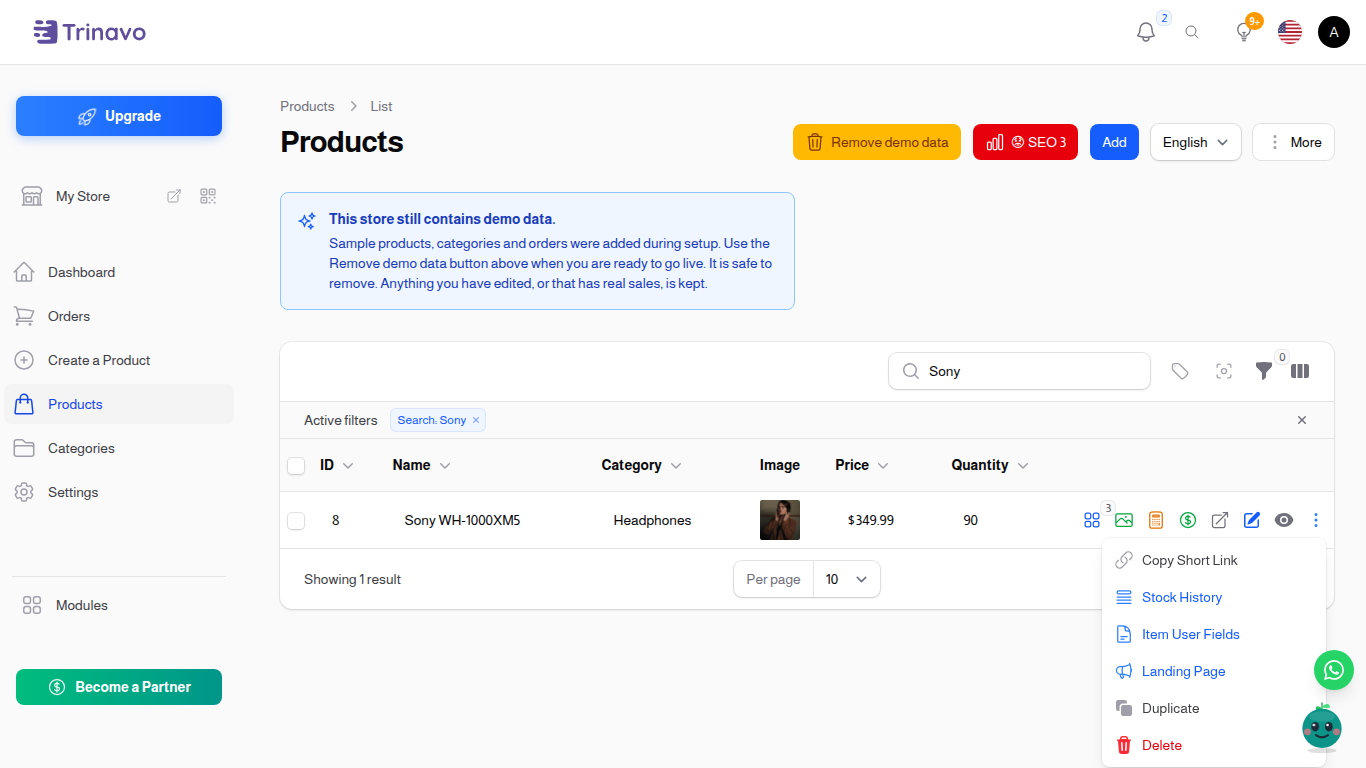
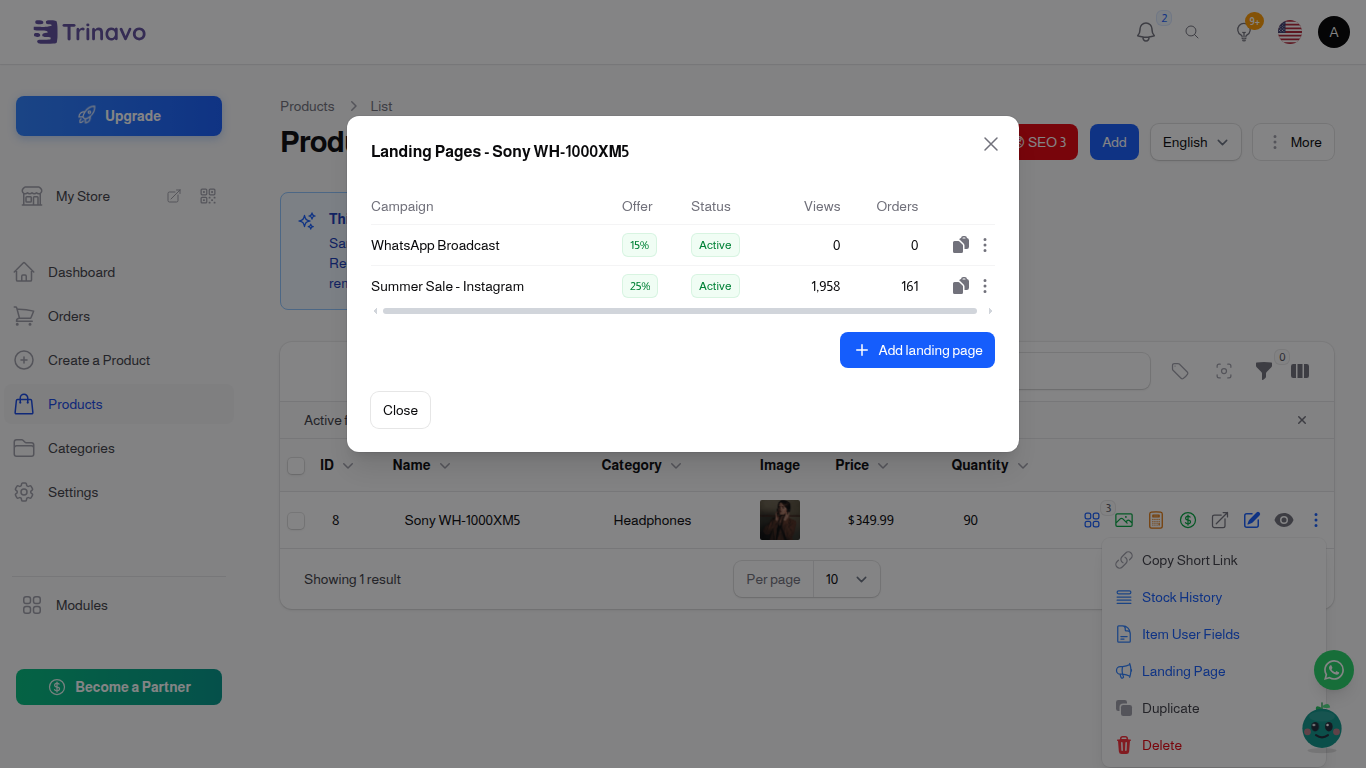
If the product already has landing pages, you see the list instead, with an Add landing page button. Each row has a copy button for the link and a menu with Open, Edit, and Delete.
You can also work from Marketing & Content > Landing Pages, which lists every landing page in the store.
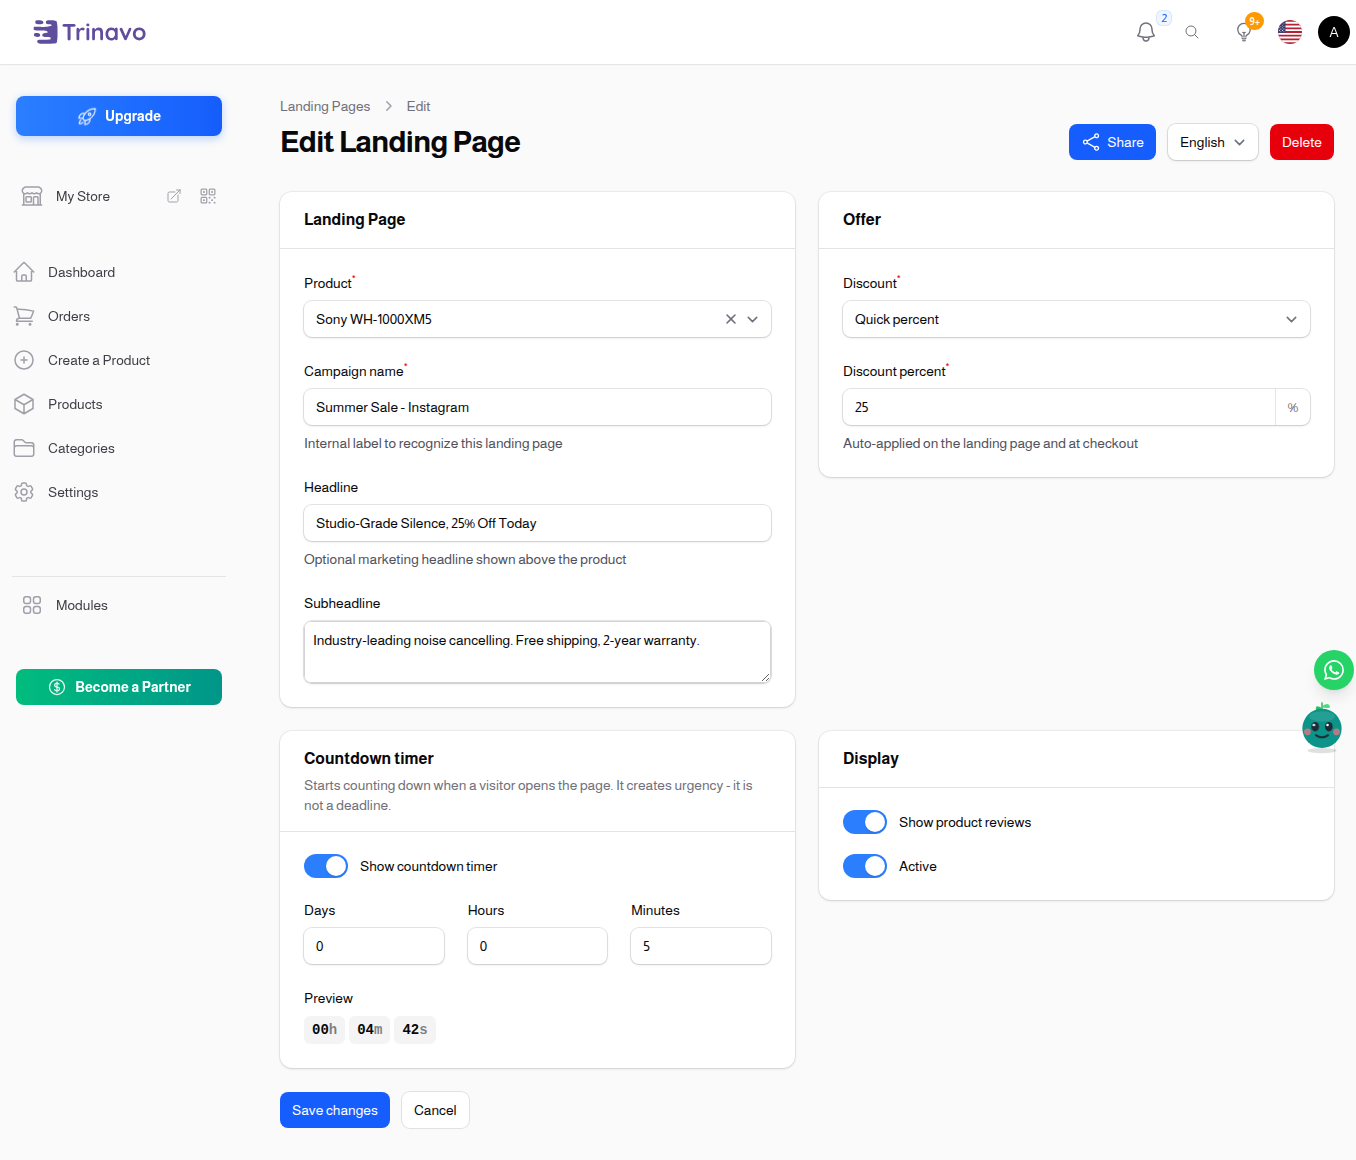
- Campaign name - an internal label so you recognise the campaign later. Customers never see it.
- Headline and Subheadline - optional marketing text shown above the product.
- Show product reviews - show your product's ratings on the page as social proof.
- Active - turn a page off without deleting it.
The offer
The Discount field decides what the visitor sees:
- No discount - the page simply sells the product at its normal price.
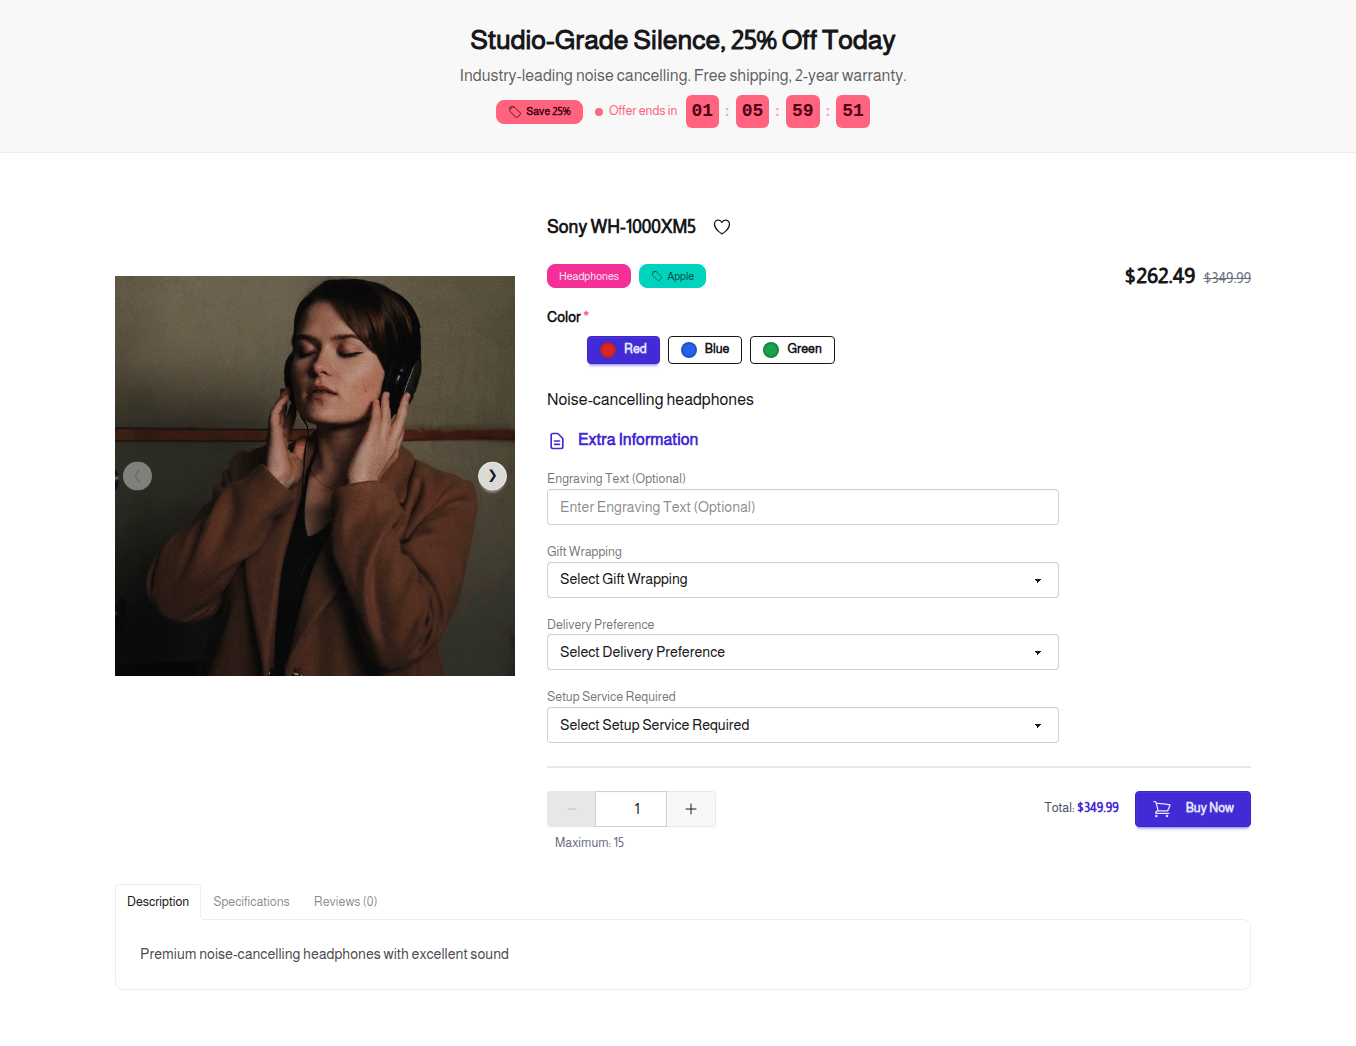
- Quick percent - type a number, for example 25. The visitor sees the old price crossed out and the new price beside it, and pays the new price. There is no code to type and nothing to remember.
- Existing coupon - use a coupon you already created instead.
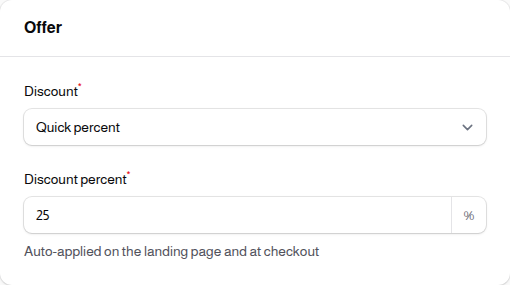
Note: the price on the page is always the price at checkout. Whatever discount the visitor sees is what they actually pay.
The countdown timer
The countdown is there to encourage people to decide now. Set it in days, hours, and minutes - it starts at five minutes by default - and the page adds them up.
The important part: the countdown is not a deadline. It starts counting when a visitor opens the page, so every single visitor sees a fresh timer running down. Your campaign can run for months and still feel urgent to whoever is reading it right now. The offer never expires on its own, and the page never says "offer ended".
The Preview underneath shows exactly what the visitor will see. Turn Show countdown timer off to hide it without losing the duration.
Sharing the link
Each landing page has its own short link. Use the Share action to get it.
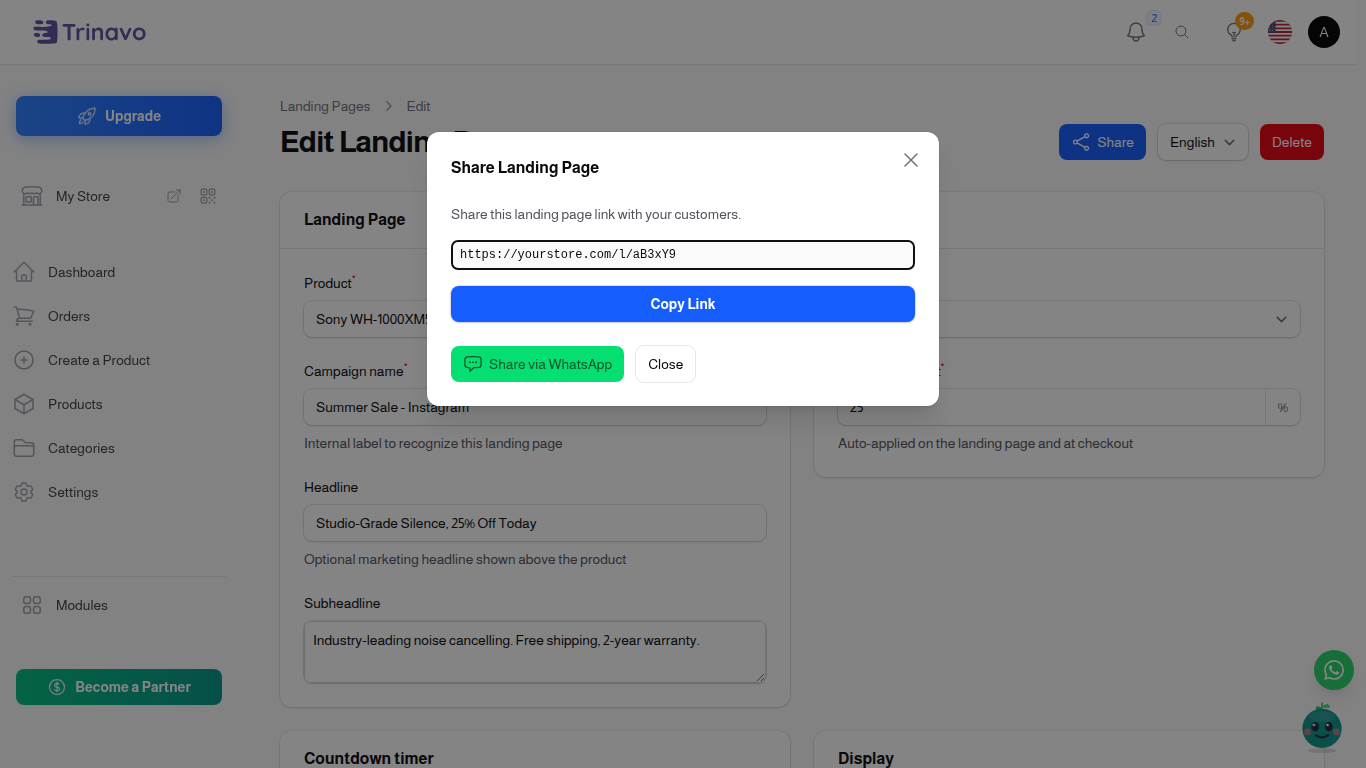
- Copy Link - copies the link so you can paste it into an ad, an SMS, a bio, or a QR code.
- Share via WhatsApp - opens WhatsApp with the product name and the link ready to send.
You can create as many landing pages as you like for the same product - one per ad, one per influencer, one per channel - each with its own link, its own offer, and its own report.
How customers buy
The page shows your product's photos, description, and options exactly as your product page does. If the product has options such as size or colour, the customer picks them right there.
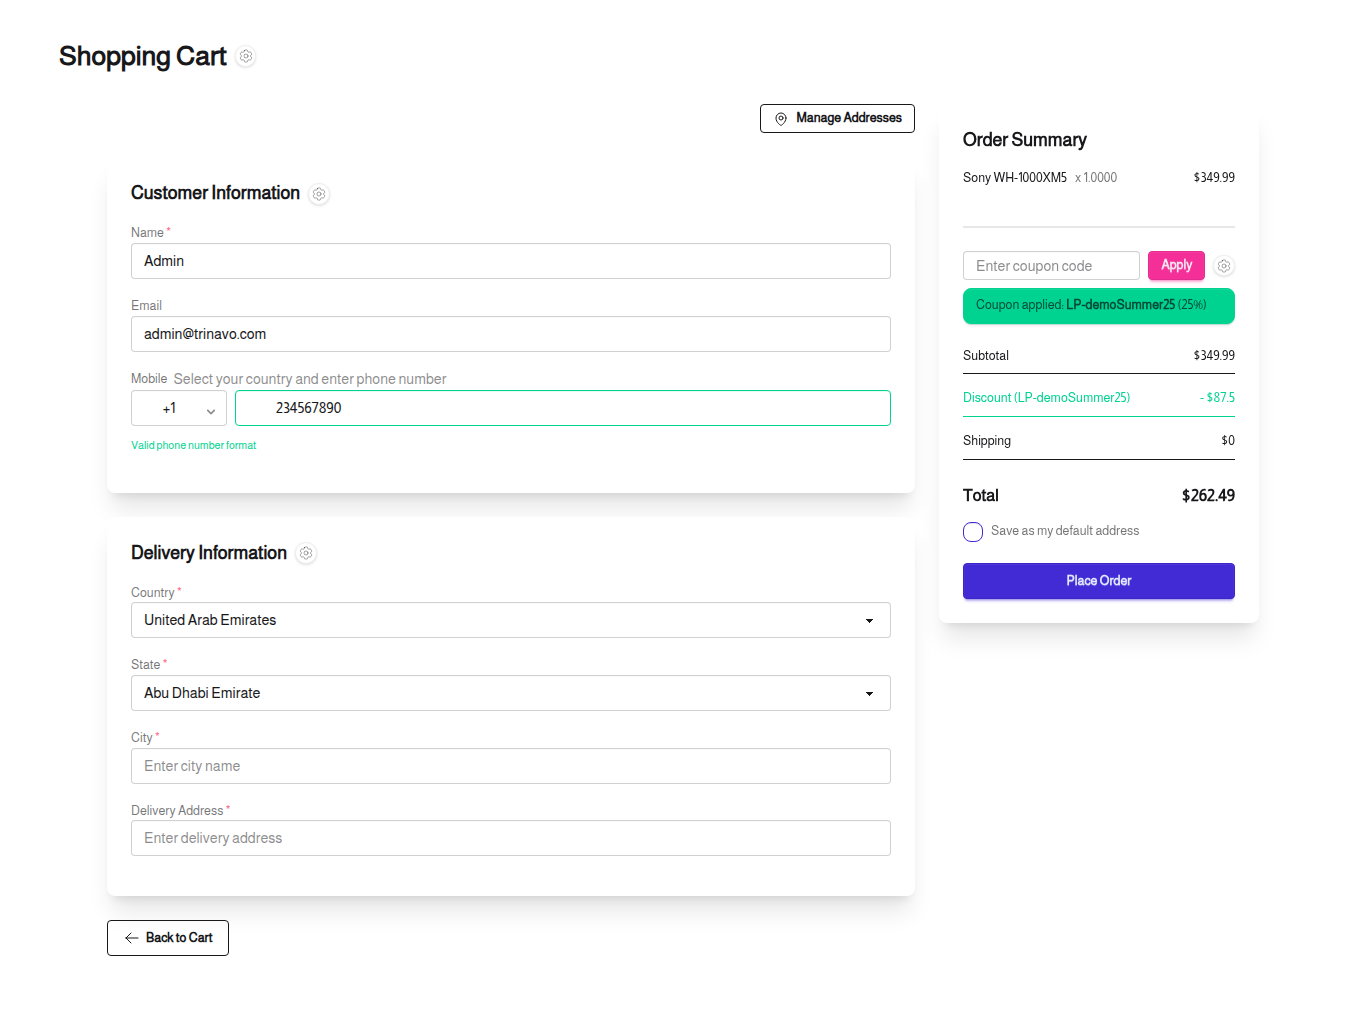
Then there is one button: Buy Now. It takes the customer straight to checkout with the product and the discount already applied - no cart, no review step, nothing else to click.
Checkout is the usual one, with every payment method your store supports, on a page that is just as free of distractions.
Reading the report
Open a landing page's Stats action to see how the campaign is doing.
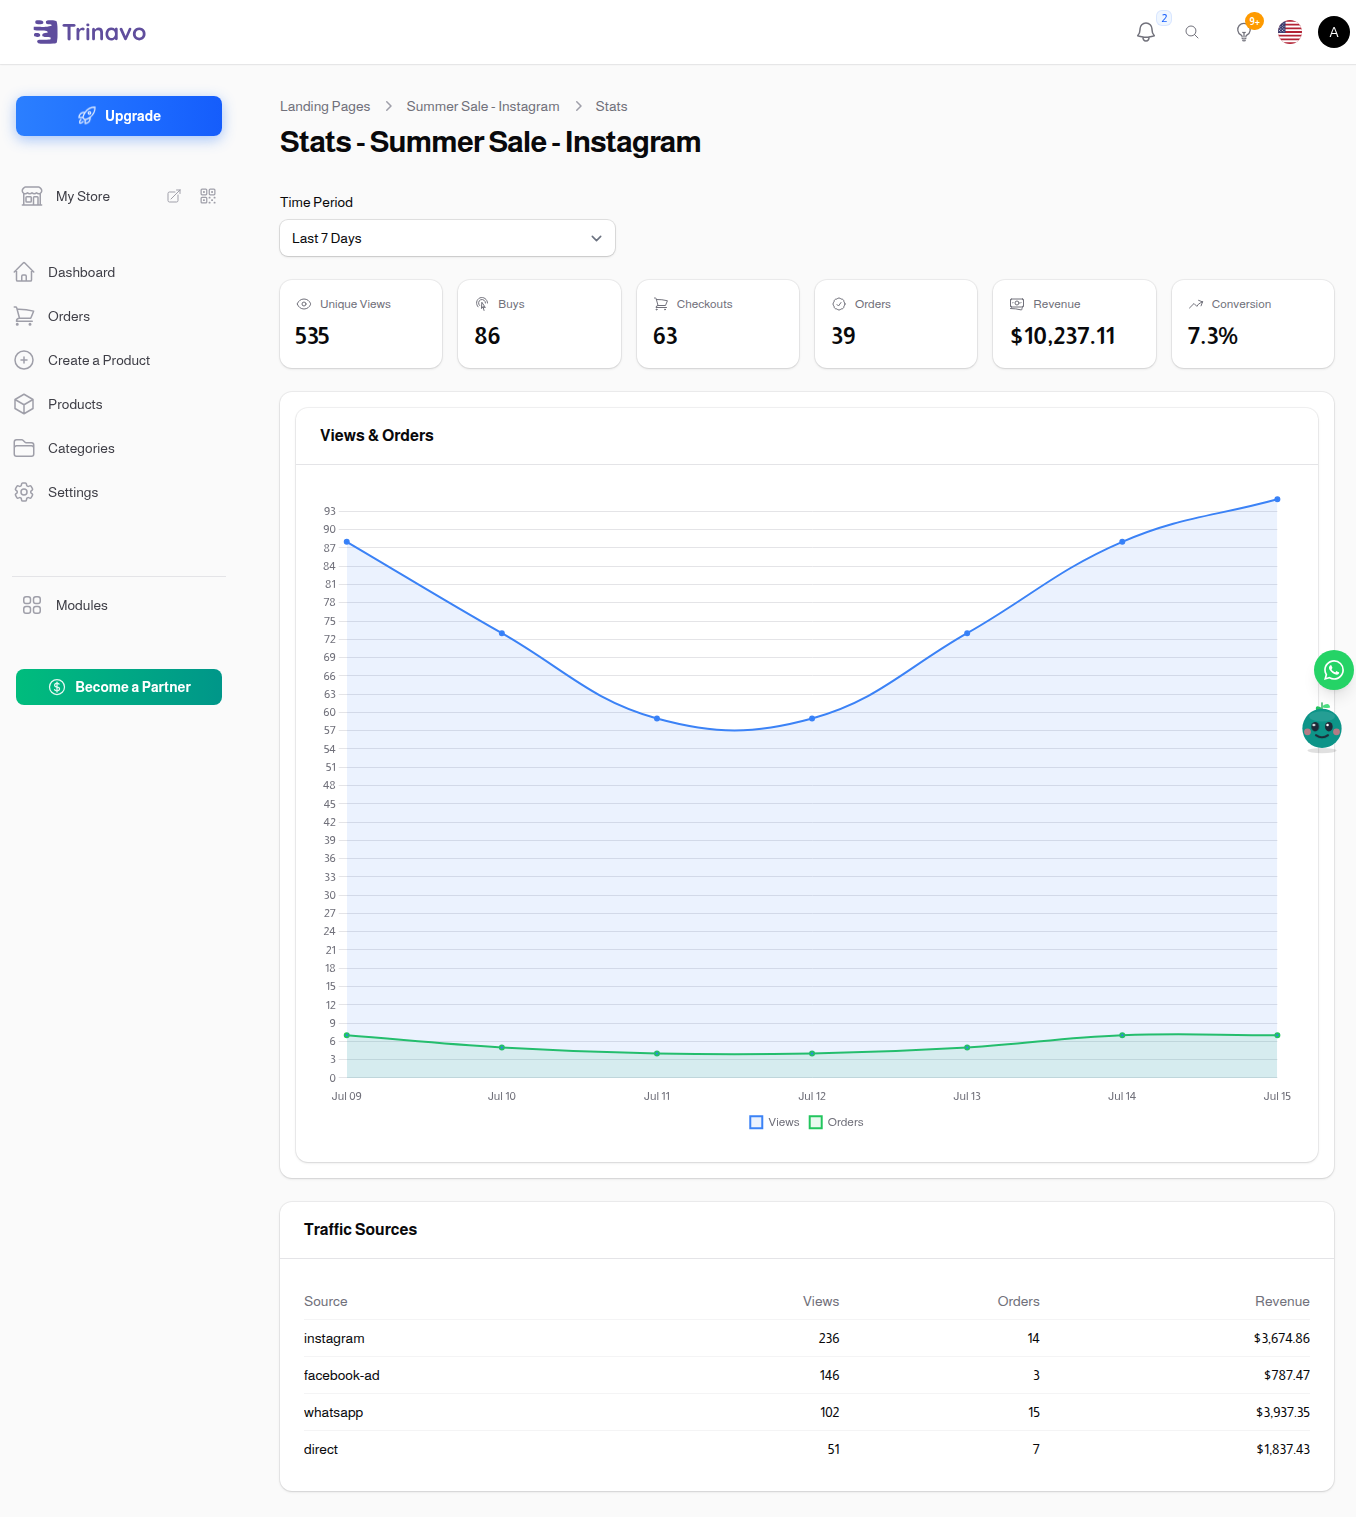
- Unique Views - how many people opened the page. Counted once per visitor per day, and robots are not counted.
- Buys - how many pressed Buy Now.
- Checkouts - how many started the checkout.
- Orders - how many actually paid.
- Revenue - how much those paid orders are worth.
- Conversion - the share of visitors who ended up paying. This is the number that tells you whether to run the campaign again.
Pick any period with the Time Period selector - today, the last 7 days, the last 30 days, this month, or a custom range - and the chart and the numbers follow.
Seeing which channel worked
Add a source tag to the end of your link and the report splits by channel. For example:
https://yourstore.com/l/aB3xY9/?utm_source=instagram
Use a different tag for each place you share the link - instagram, whatsapp, facebook-ad - and the Traffic Sources table shows views, orders, and revenue for each one. Links shared without a tag are counted as Direct.
Troubleshooting
My landing page link shows "page not found"
Check three things: the landing page is Active; the product itself is enabled and approved; and landing pages are turned on in Settings > Landing Pages. If your store is not on a paid plan, landing page links do not open for customers.
Customers are asked to log in before they can buy
Guest checkout is switched off. Turn on Allow Guest Cart in Settings > Cart. This matters more here than anywhere else, because most people arriving from an ad have never visited your store before.
The report shows zeros
If the page is new and nobody has opened it yet, zeros are correct. Remember that a visitor is counted once per day, robots are ignored, and orders only appear after the customer has actually paid.
The countdown restarts every time I refresh
That is how it works. The countdown is an urgency timer that starts fresh for each visit, not a deadline for the offer.
I cannot create a landing page
Landing Pages is a premium feature and your store is not on a paid plan. You can still see the landing pages you already have, but not add or change them. The page shows an upgrade prompt, and you can start a free trial from there.