Point of Sale
Overview
Point of Sale turns any phone, tablet, or computer into a cash register for your counter. A customer standing in front of you is served from the same catalog your website sells from, pays cash or by card, and walks away with a printed receipt.
The important part is what that shares with your online store:
- One catalog. The register sells the products you already have, with the same prices, options, and photos. Nothing to enter twice.
- One stock. A sale at the counter drops the online quantity immediately, and an online order drops what the counter can sell. You cannot sell the last item twice.
- One order list. Counter sales appear in Orders beside your website orders, in the same reports, against the same customers.
Why the register matters
Most shops that also sell online end up running two businesses: one stock sheet for the shelf, another for the website, and a reconciliation at the end of every week. Whatever sells fastest is the thing that gets oversold.
With the register there is only one set of numbers. The person at the counter and the customer on the website are drawing from the same shelf, and you see the whole day's takings in one place, whichever way the money came in.
Getting the register
There is no switch to turn on. Point of Sale is a paid feature, and your subscription is what opens it: as soon as your plan includes it, the register works.
The Point of Sale group is in the Modules panel either way, because a store looking for the register is exactly the store that does not have it yet. What the entry does depends on your plan:
- With the feature - Open Point of Sale opens the register itself.
- Without it - the same entry opens a page explaining what the register does, with an Upgrade button. If your plan cannot be upgraded from here, it asks you to contact us instead.
Opening the register
There are three ways in, and they all lead to the same screen:
- Modules → Point of Sale → Open Point of Sale. This opens in a new tab, so the admin panel stays where you left it.
- The Open Register button at the top of Settings → Point of Sale Settings.
- The address
/poson your store's domain, which is what you would bookmark on a counter tablet.
Adding it to the home screen
On the register screen, open the menu under your name and choose Install app. The register is then an icon on the device like any other app, opening straight to the selling screen with no address bar.
Two things to know about it:
- It is a shortcut, not a separate program. The device still needs an internet connection to open it. Once it is open, a sale in progress keeps working if the connection drops; you just cannot finish that sale until it is back.
- It is separate from your store's own app. Both can sit on the same device, and installing one does not change the other.
On iPhone and iPad the browser cannot install it for you: choose Install app and follow the two steps shown, using the Share button.
Letting staff use the register
Navigate to: Users and edit the staff member.
Give them the Cashier role. A cashier can use the selling screen and nothing else: they cannot open the admin panel, see your reports, or change prices. After they sign in they land on the selling screen straight away.
If you want someone who both sells and runs the store, use Store Manager instead, which includes the register and the ability to give discounts.
The name in the top corner of the register always shows who is signed in, because every sale is recorded against that person. Tap it to sign out and hand the counter over. If a ticket is still open, you are warned before signing out.
Making a sale
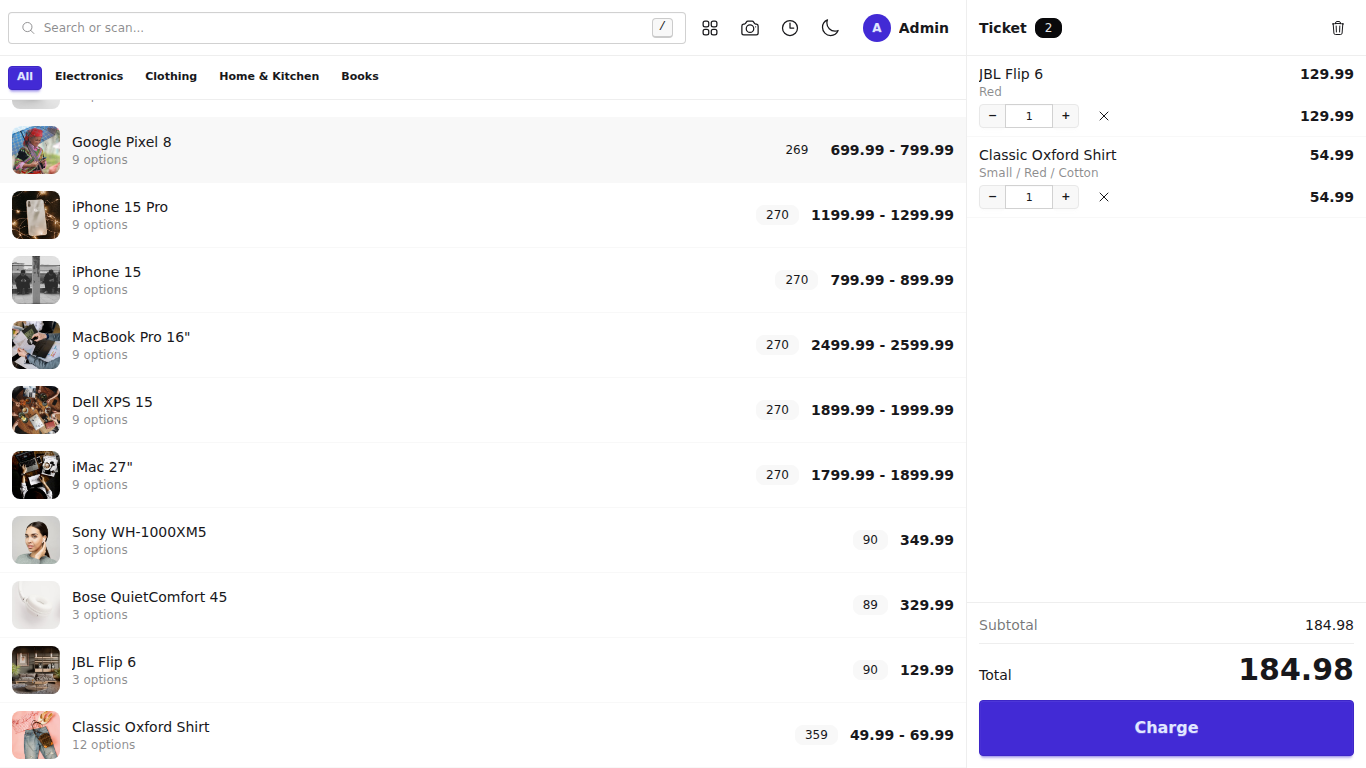
- Find the product. Type part of its name, scan its barcode, or just tap it in the list.
- Choose the options if the product has any, such as size or colour.
- Adjust the quantity with the plus and minus buttons.
- Press Charge, choose Cash or Card, and enter the amount received.
- Press Charge again. The receipt prints and the change owed is shown in large type.
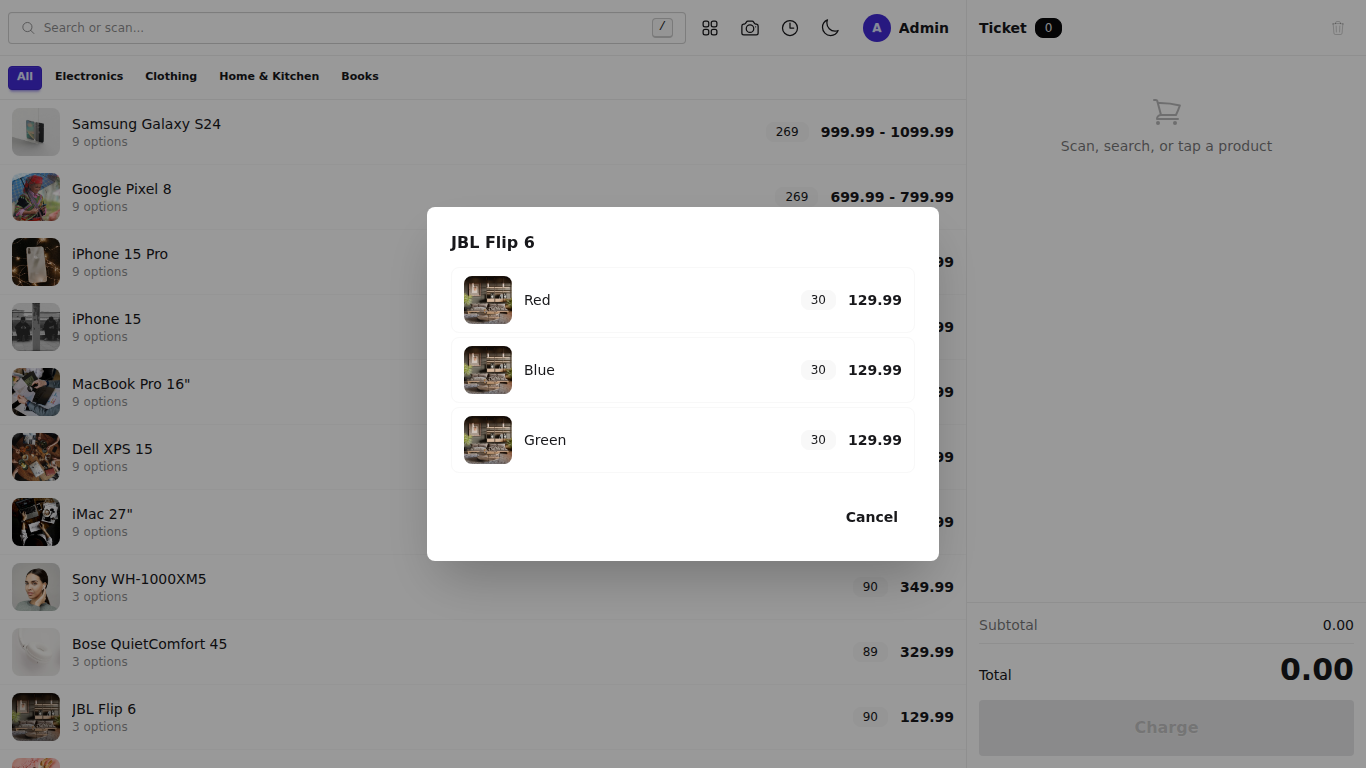
Taking the money
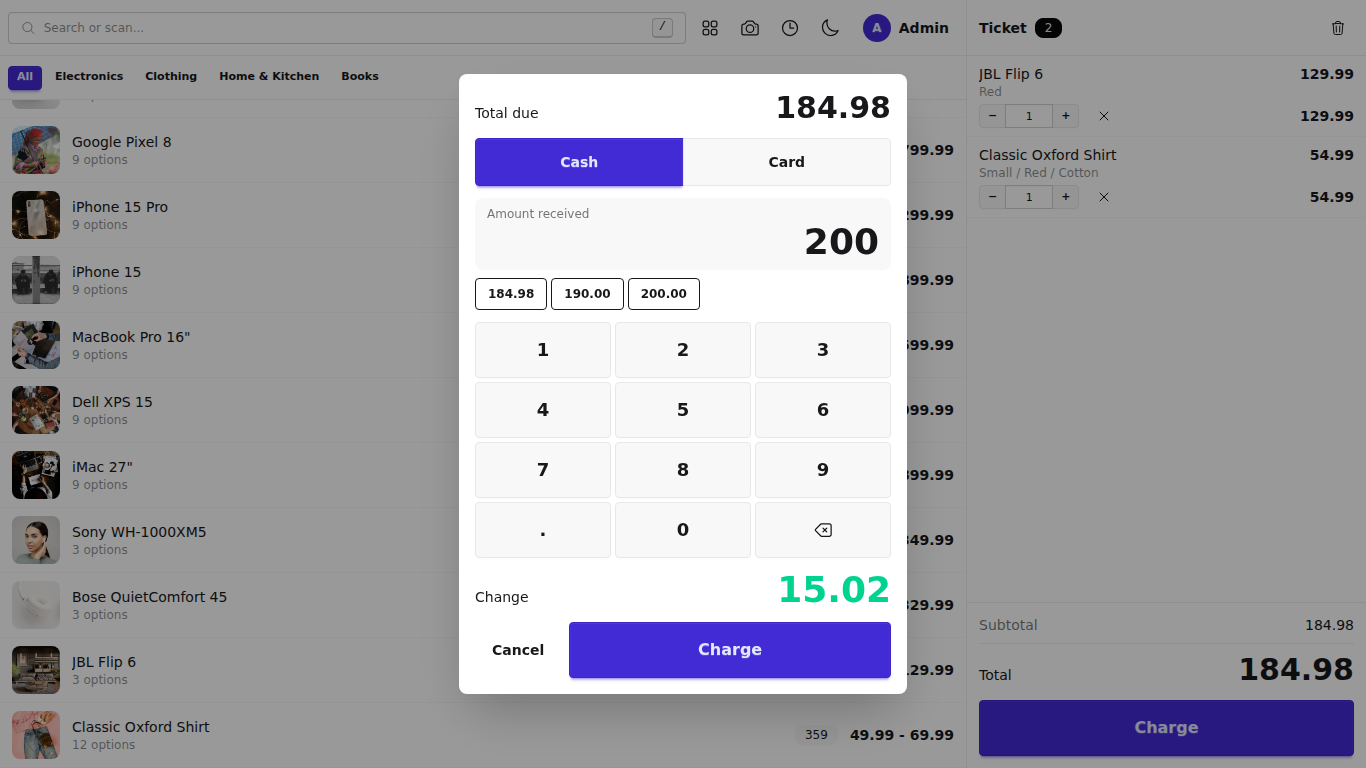
- The quick amount buttons cover the usual cases: the exact total, the next round ten, the next round fifty. One tap instead of typing.
- Change owed updates as you type, so you can count it out before the sale is even finished.
- To split a payment, enter the first amount and press Add tender, then enter the rest. A sale can be part cash and part card, in any combination.
- If the customer pays less than the total, the sale still completes and the order is marked partly paid.
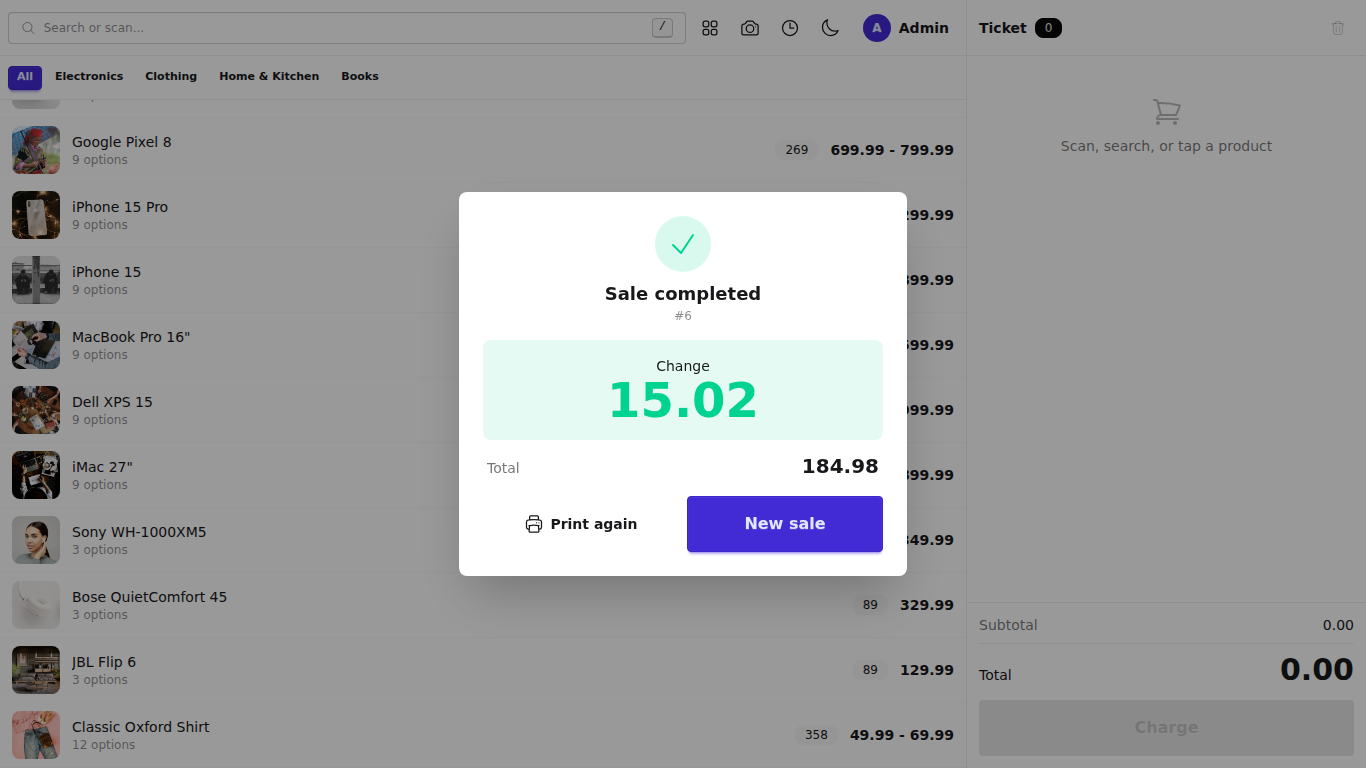
The change owed stays on screen until you start the next sale, so it cannot disappear while you are counting notes.
Finding products quickly
- Search matches the product name, its code, and its barcode. Arabic spelling differences do not matter: searching for "قهوه" finds "قهوة".
- Category buttons show everything filed under that category, including everything in the categories beneath it.
- Tap a product photo in the list to see it larger, where you can zoom in and add it to the ticket from there. In grid view, use the small eye icon on the corner of the picture. Options show their own photo when they have one.
- Recent sales, the clock icon, reprints a receipt from earlier in the day.
Scanning barcodes
A USB or Bluetooth barcode scanner works with no setup at all. Plug it in, scan, and the product is added to the ticket immediately.
If you have no scanner, the camera icon turns the device's camera into one. And you can always find the product by typing, so a broken scanner never stops a queue.
Receipts
Receipts print from the browser to any printer the device can already use, including 58 mm and 80 mm thermal printers. Arabic prints correctly, with the letters joined and the numbers reading left to right.
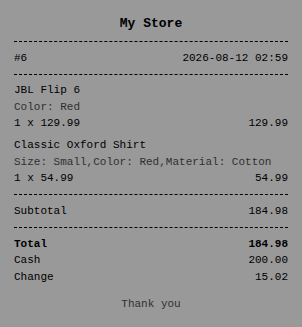
Set the paper width and what appears above and below the items under Settings → Point of Sale Settings. To reprint, open Recent sales and choose the sale.
Using it on a phone
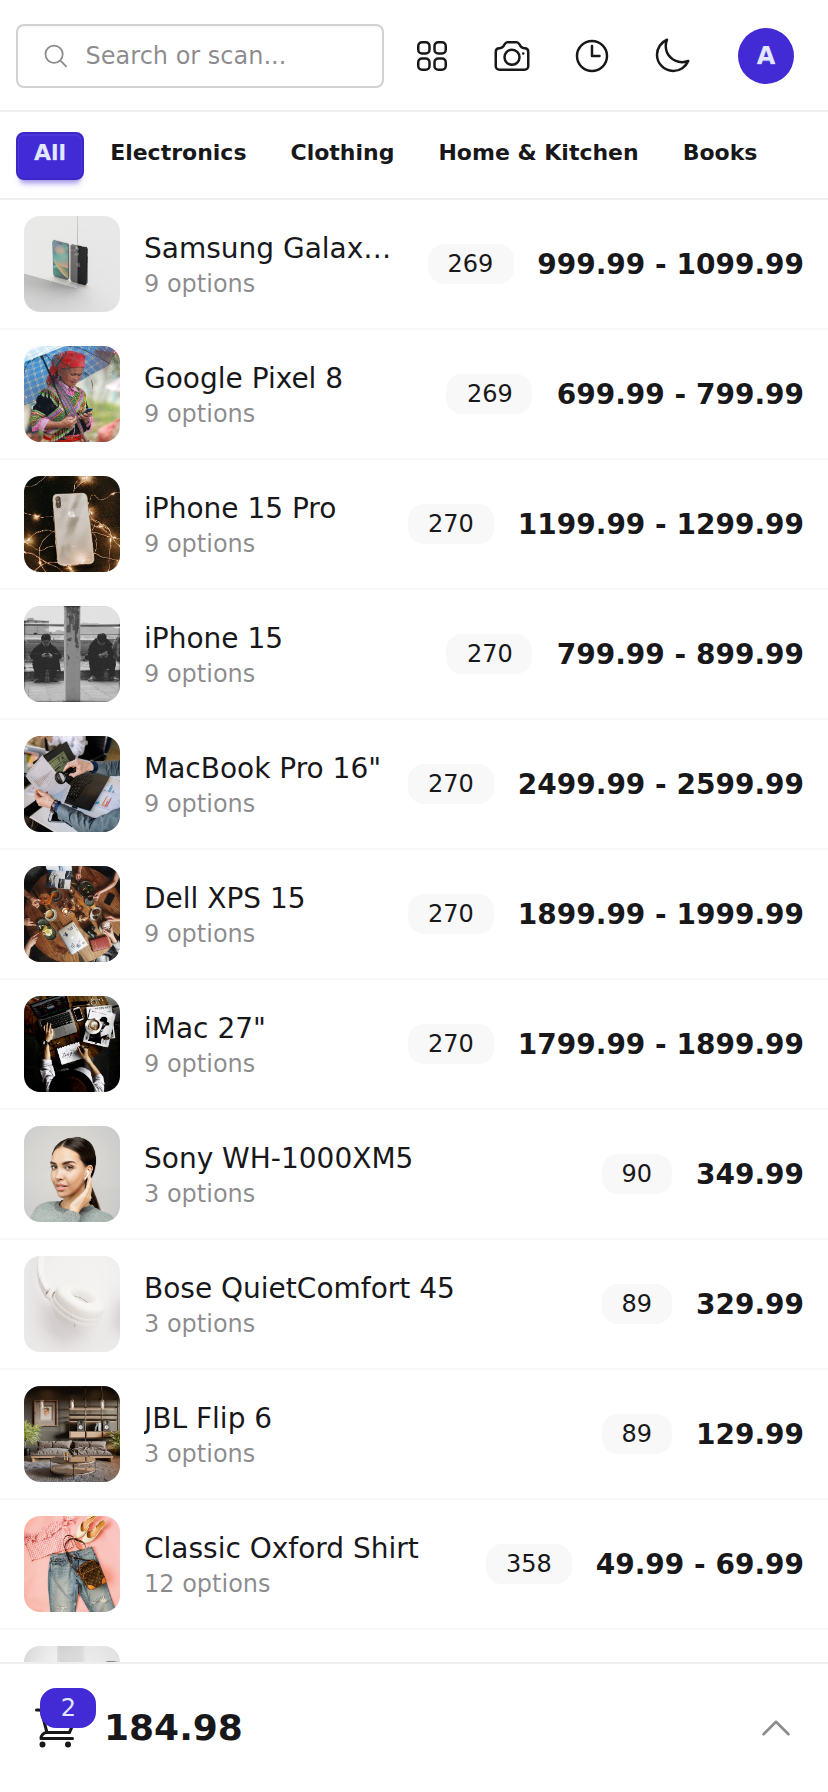
The register works on a phone as well as a counter screen. The products fill the screen and the ticket becomes a panel you pull up from the bottom bar, which always shows the number of items and the total.
Settings
All of these are under Settings → Point of Sale Settings, split into two sections, Receipt and Cashier Rules:
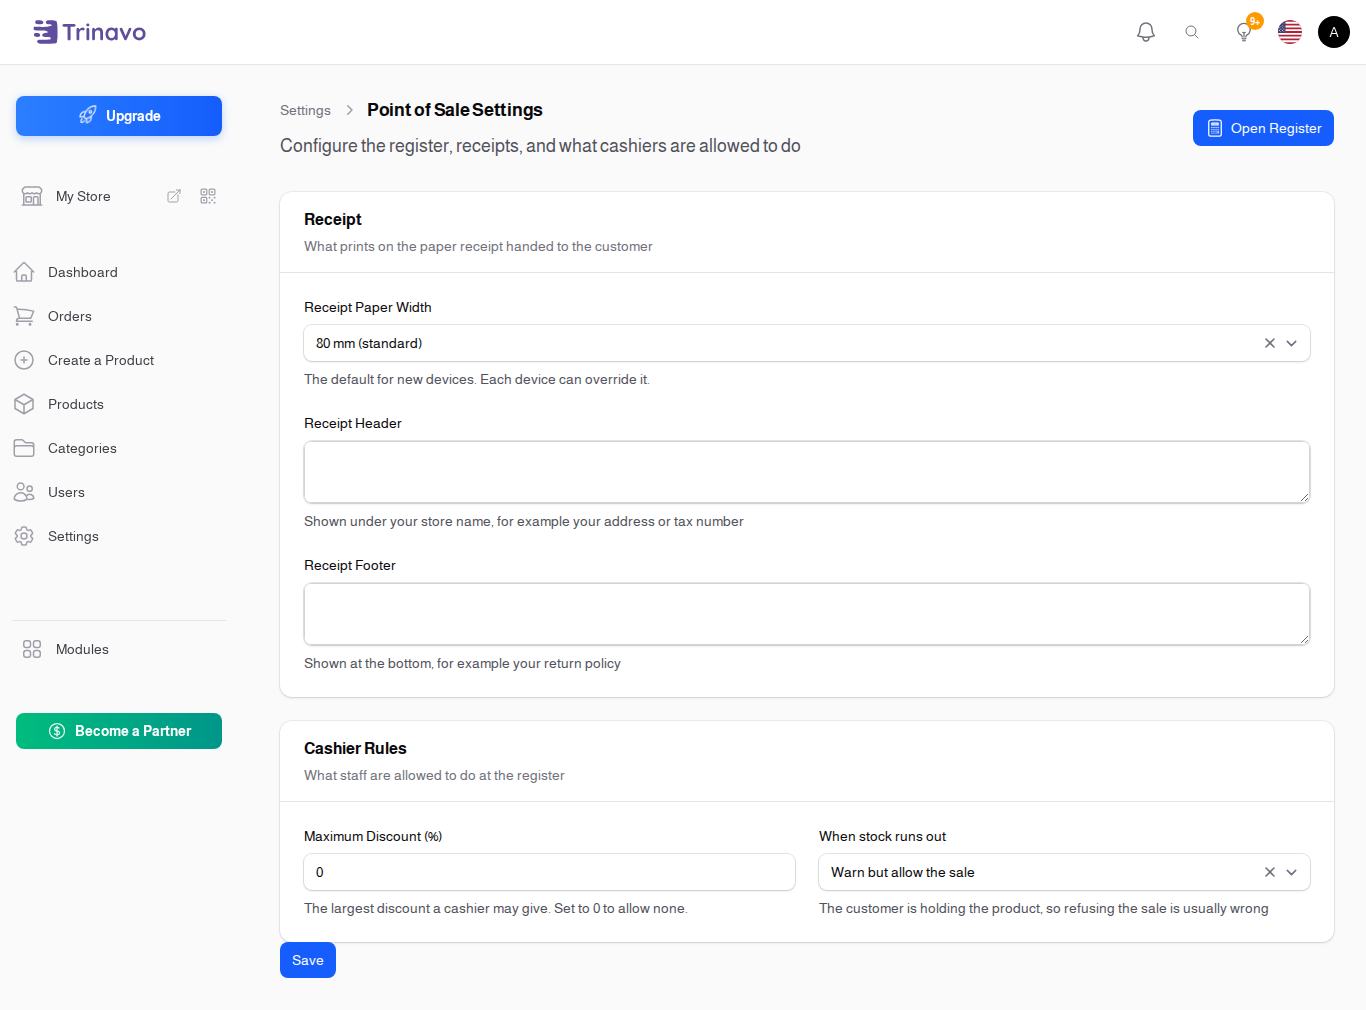
- Receipt Paper Width - 80 mm is the usual size, 58 mm is the narrow one. This is the default for new devices; each device can use a different size.
- Receipt Header - printed under your store name, for example your address or tax number.
- Receipt Footer - printed at the bottom, for example your return policy.
- Maximum Discount (%) - the largest discount a cashier may give. Leave it at 0 to allow none.
- When stock runs out - whether a cashier may still sell a product the system shows as finished. The customer is usually holding it, so allowing the sale is the normal choice.
The two receipt lines are per language, so a store selling in Arabic and English prints the right one on each.
Where counter sales go
A counter sale is an ordinary order. Nothing about it is kept in a separate place.
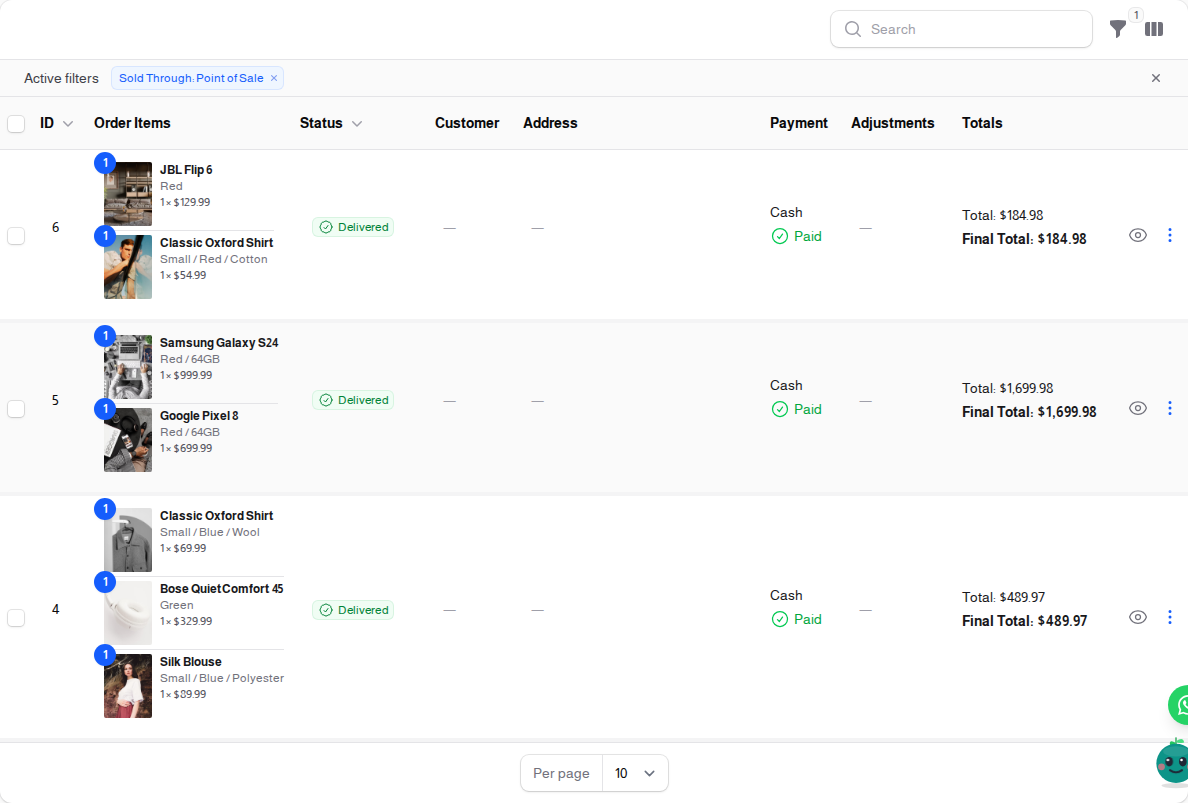
- Orders lists it beside your website orders, marked as delivered and paid, with the payment shown as cash or card. To see only counter sales, use the Sold Through filter. You can also add a Sold Through column to the list from the column button above the table.
- Stock drops the moment the sale completes, so the website stops offering what you just sold off the shelf.
- Reports and analytics include it in the day's revenue like any other sale.
- Customers, if you attached one to the sale, keep it in their history, so what someone buys in the shop counts towards their loyalty and their level.
What the register does not do yet
These are deliberate, so you know what to expect:
- No returns or refunds at the register. Handle those from the admin panel as you do for online orders.
- No shift or cash-drawer management. There is no opening float and no end-of-day till report.
- The register cannot open a cash drawer. A browser is not allowed to.
- No selling by weight. Quantities are whole numbers, so it does not suit produce priced per kilo.
- No offline sales. You can keep adding products to a ticket without a connection, but finishing the sale needs one.